To give trainees access to play scenarios, you will need to create a group that will be assigned to both the scenarios and your trainees. ✅
You can form groups of trainees according to their level / job title in your organization, or according to your usual training groups. You can create a group before or after adding trainees to Warp Studio.
⚠️ This doesn't include trainees coming from an LMS.
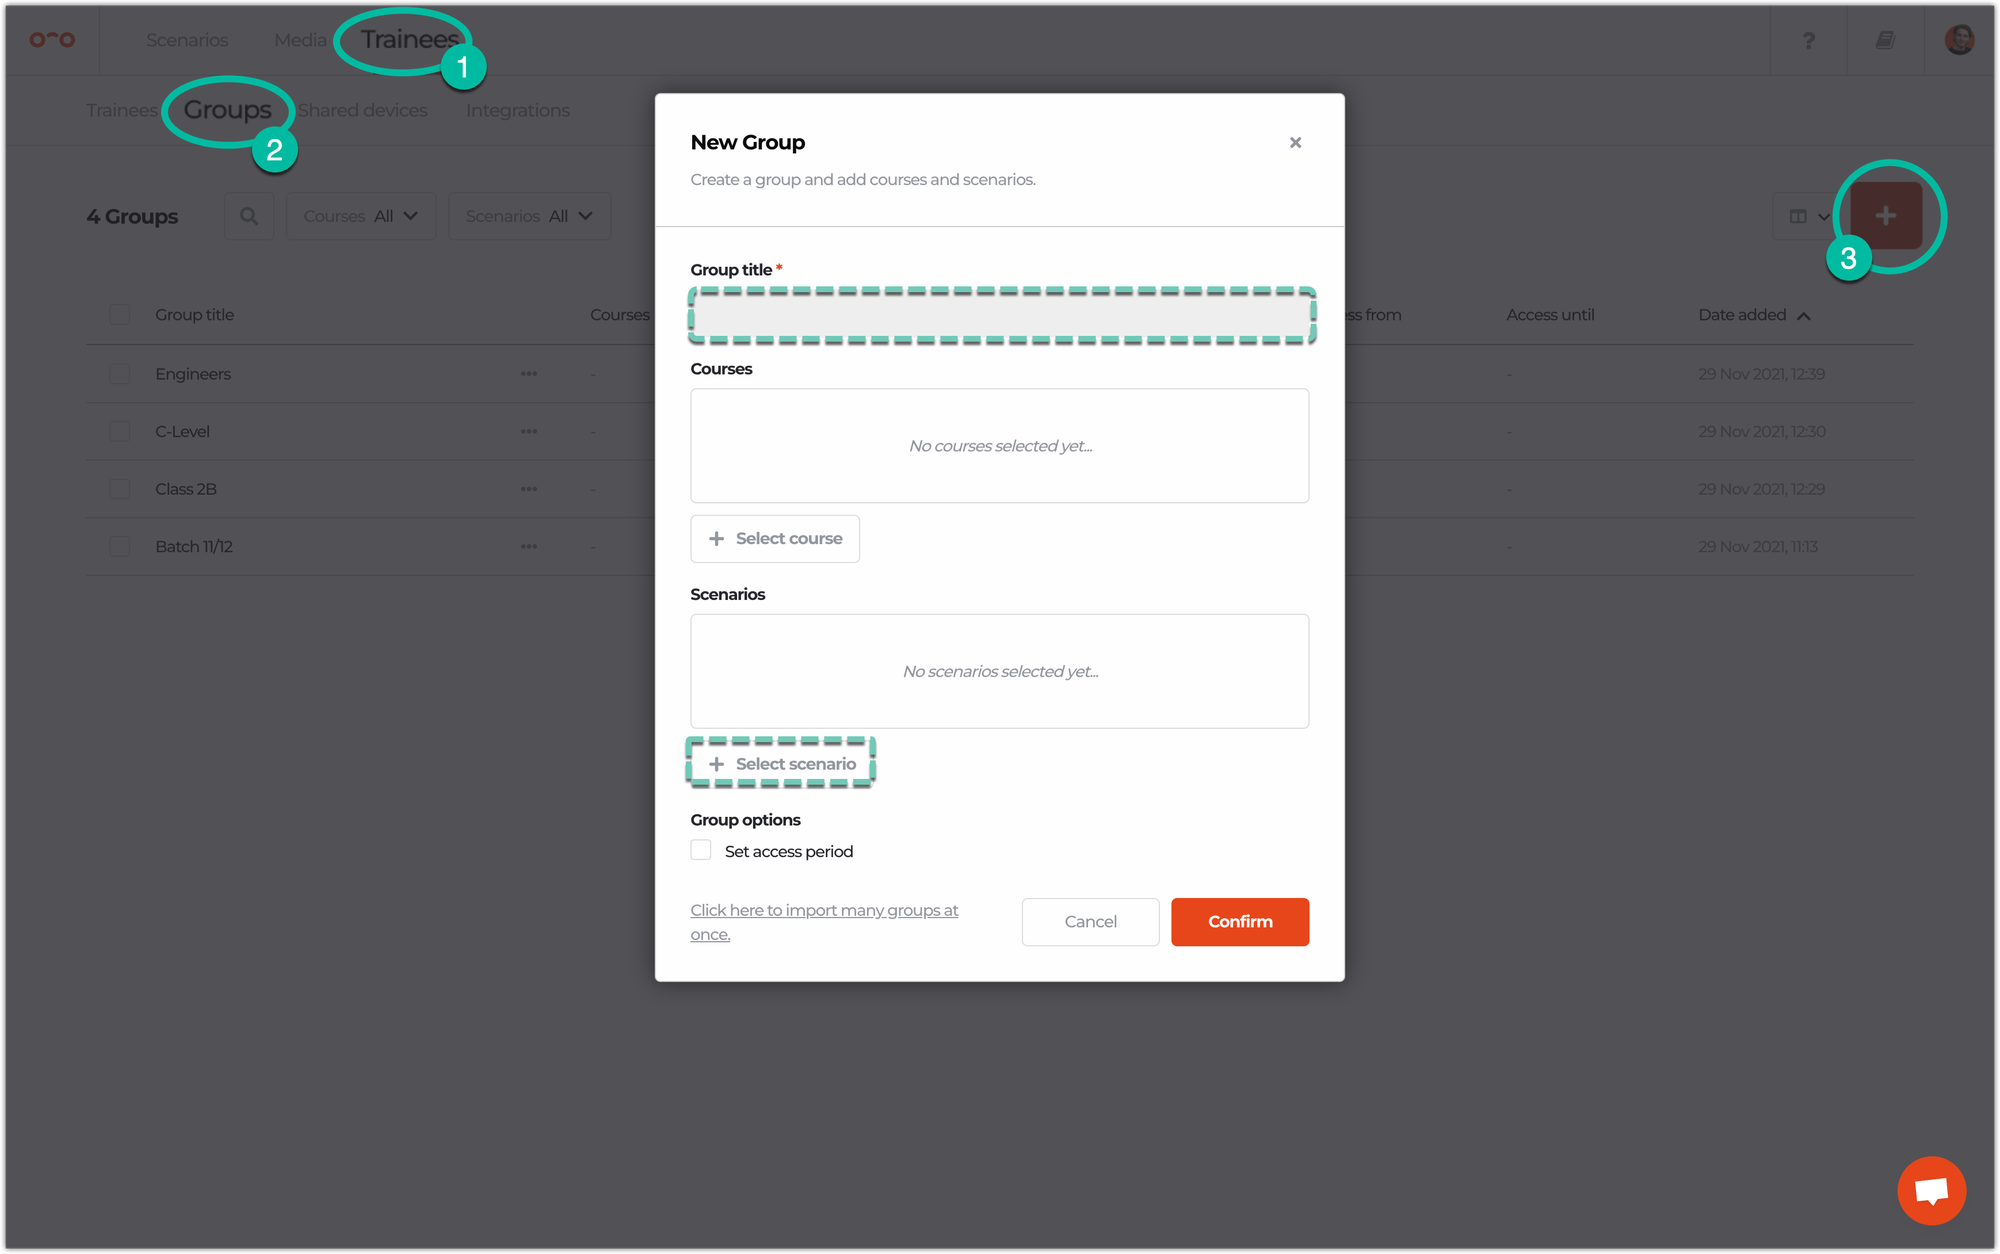
🏡 Add a new group
- Navigate to the Trainees tab and select Groups.
- Click on the Add group button to add a new group.
- Fill in a group name and select which scenarios and/or courses the trainees in that group should have access to. Only published scenarios can be selected. ✅
🤓 Add trainees to a group
Adding trainees to a group can be done in various ways:
- Add one or more existing trainees
- Add a new trainee manually
- Add many trainees at once using our import tool
- Change group of trainees
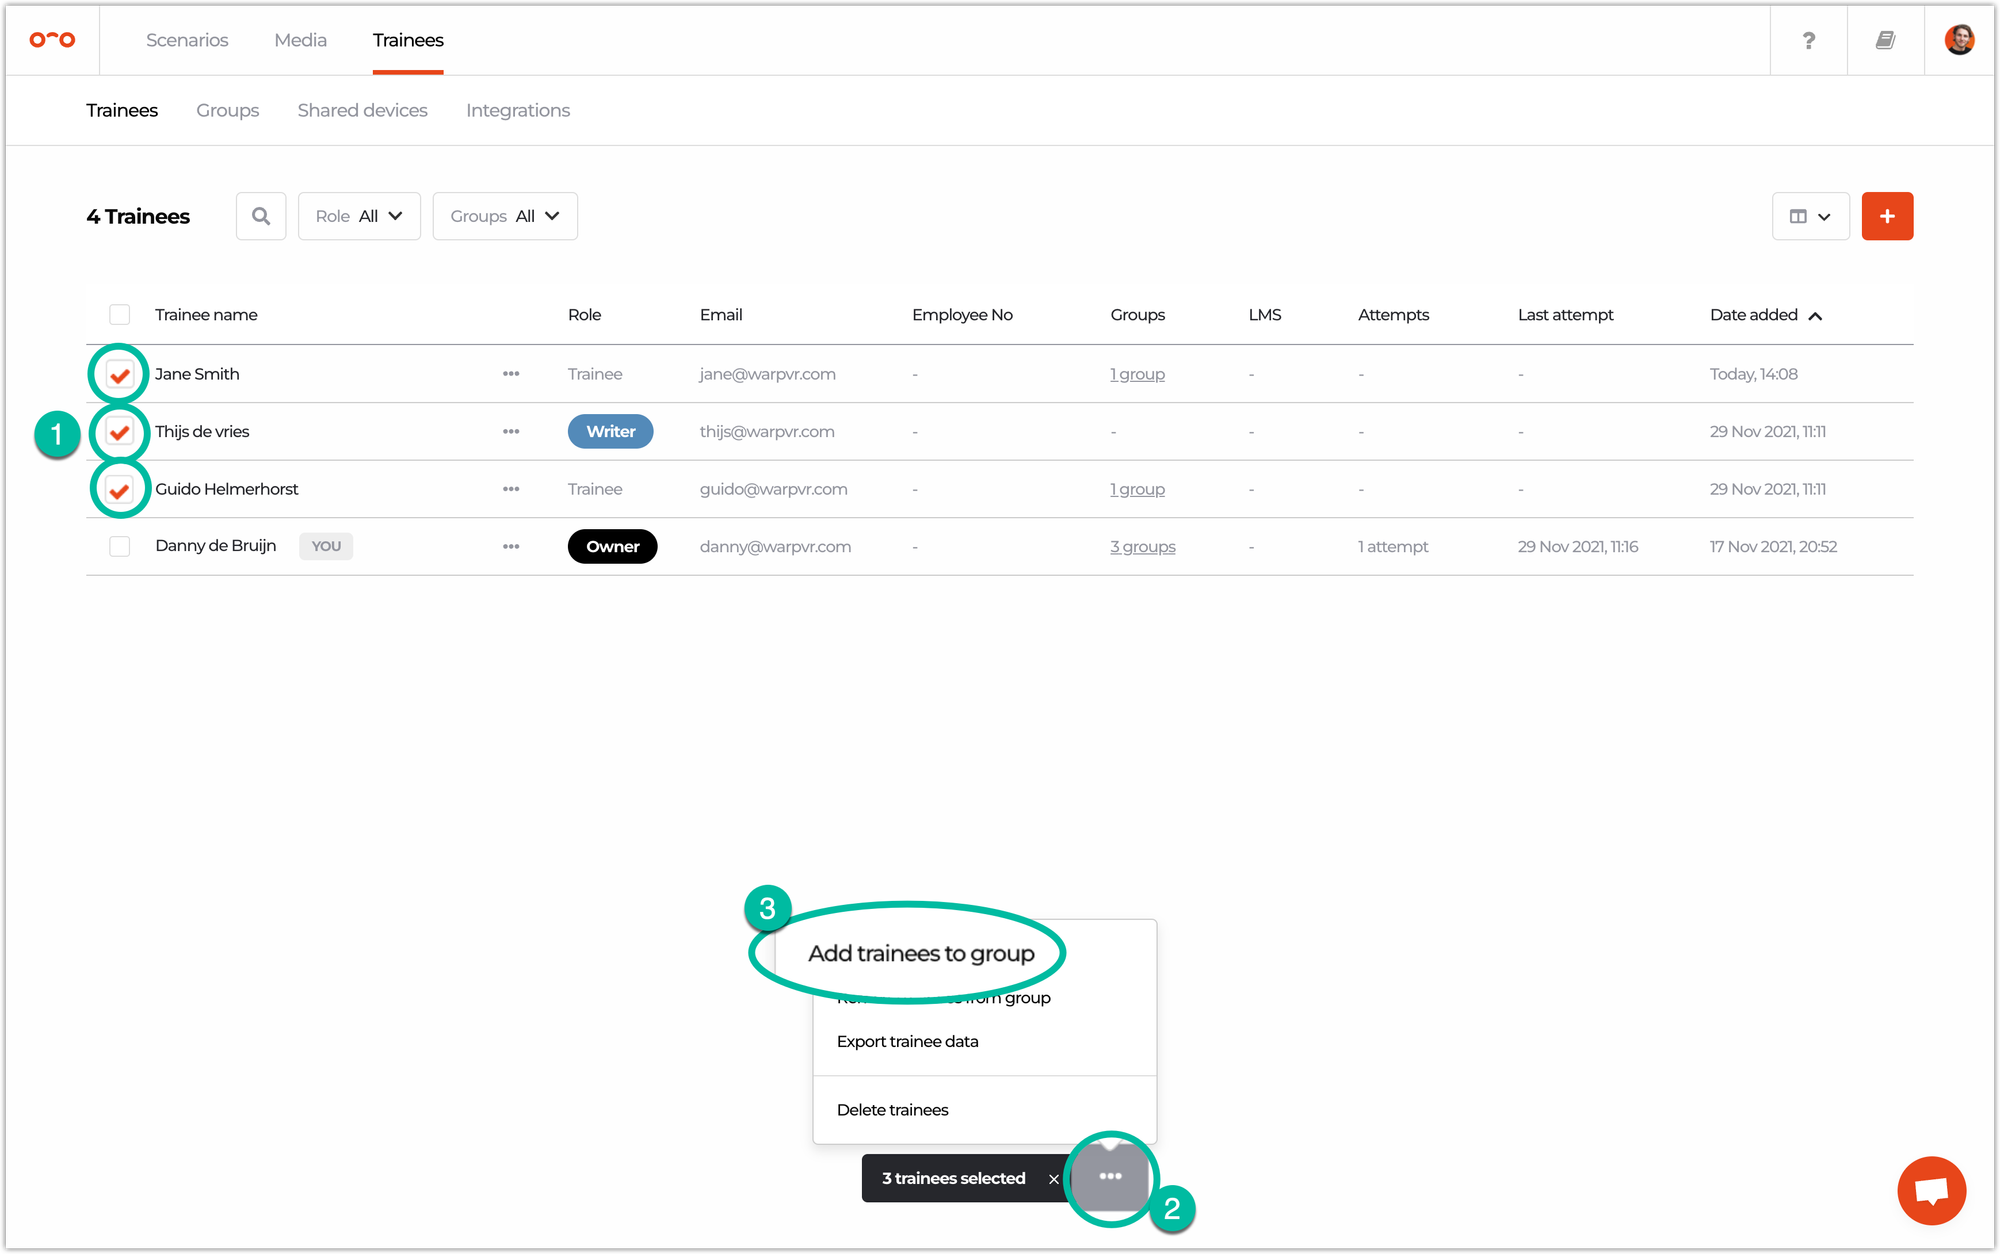
➡️ Add existing trainees to a group
If you have existing trainees in Warp Studio, click the checkbox ✅ before their name and select as many trainees as you wish. Click the three dots 🚥 button at the bottom of the screen and add or remove these trainees to a group.
➡️ Add new trainees to a group
A group can be directly assigned when adding a new trainee for access to playing scenarios. Once you hit the Add trainee button and assign their role, below you can select the group they should have access to.
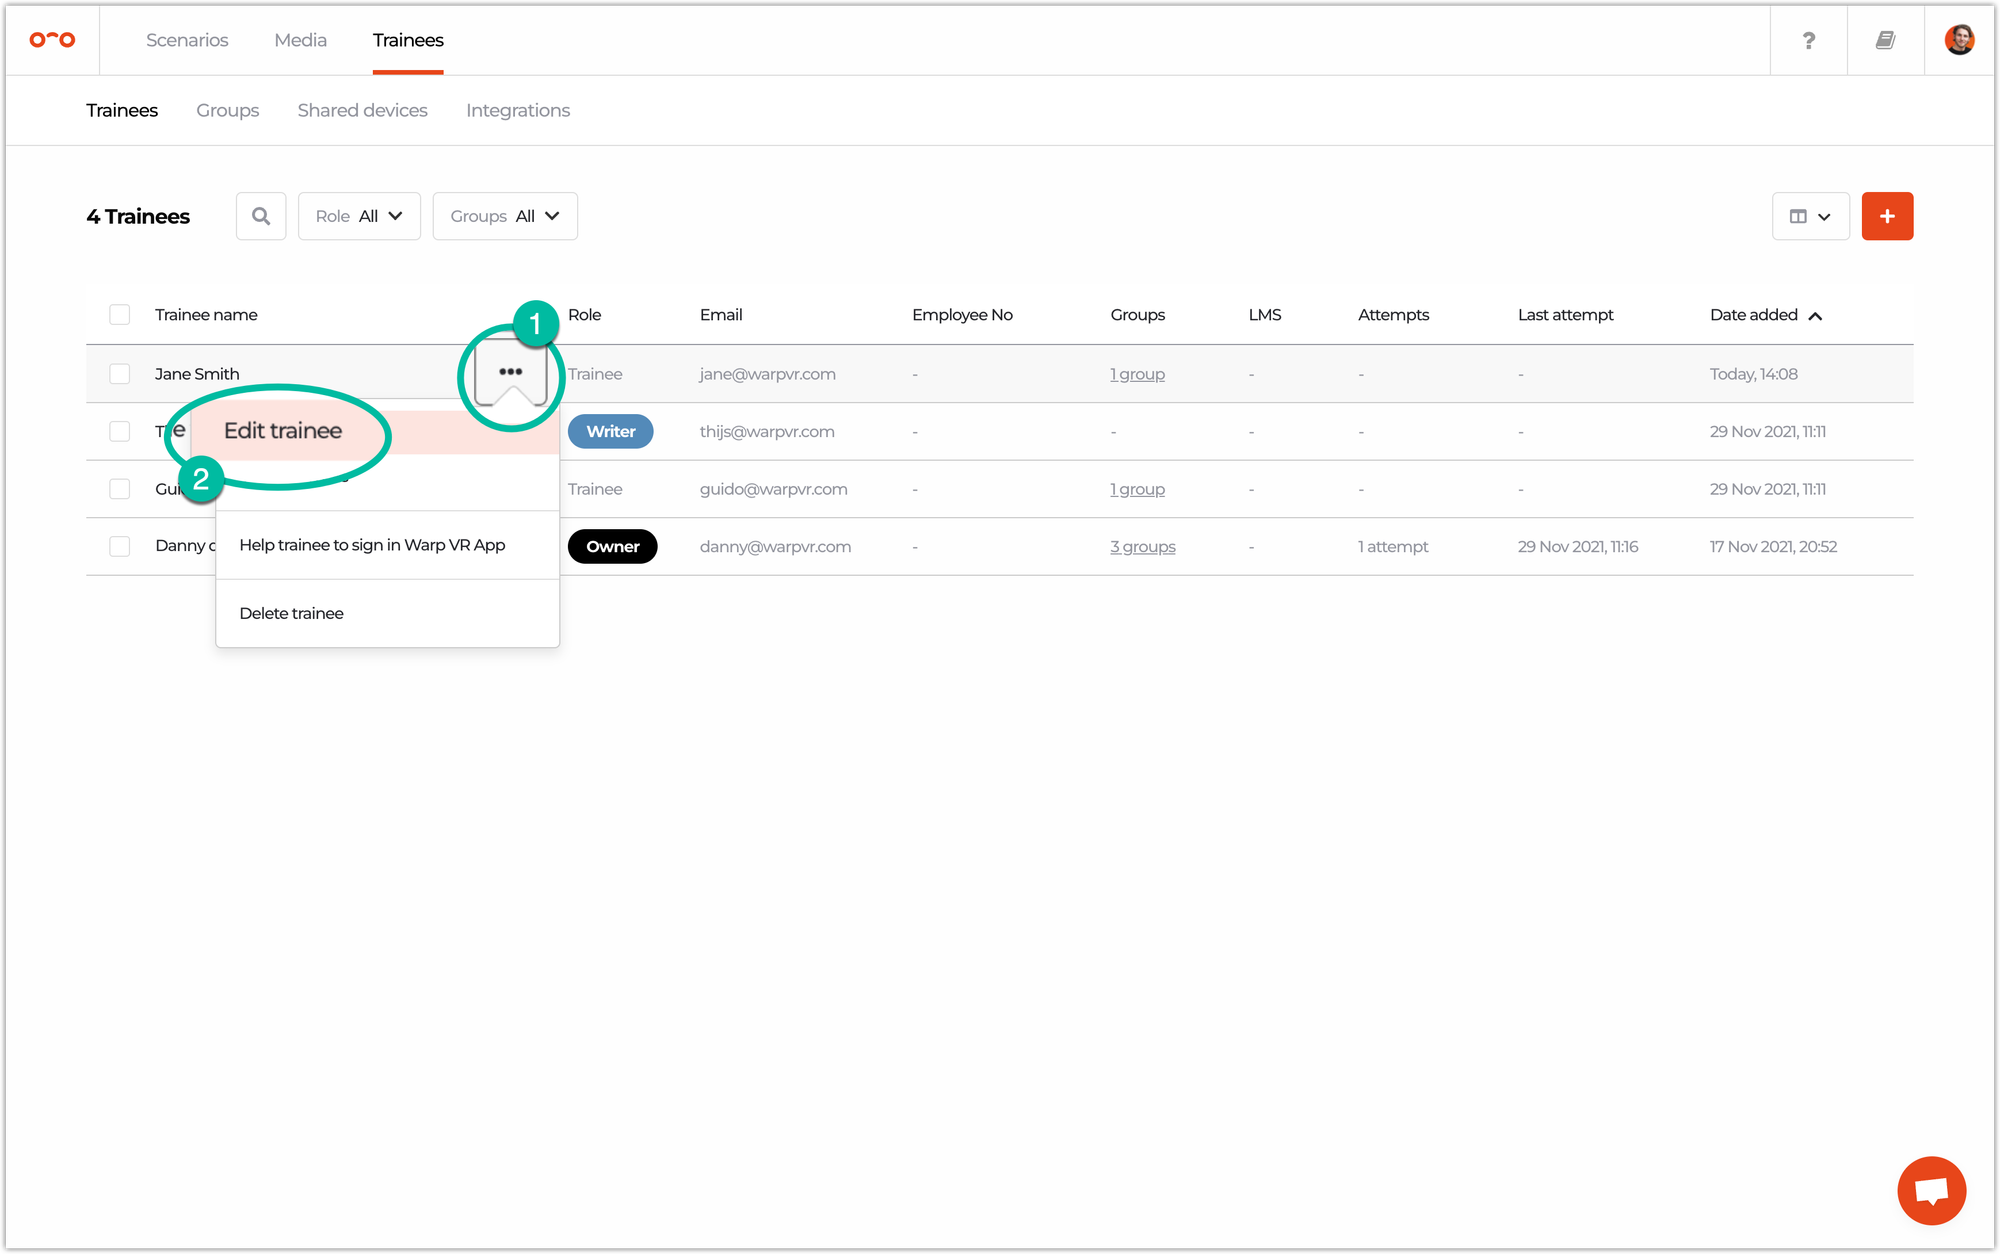
➡️ Change group of trainees
If you wish to change the group a trainee is assigned to, select the three dots 🚥 next to the trainee’s name and click on Edit trainee, where you can change which groups they should be a member of.
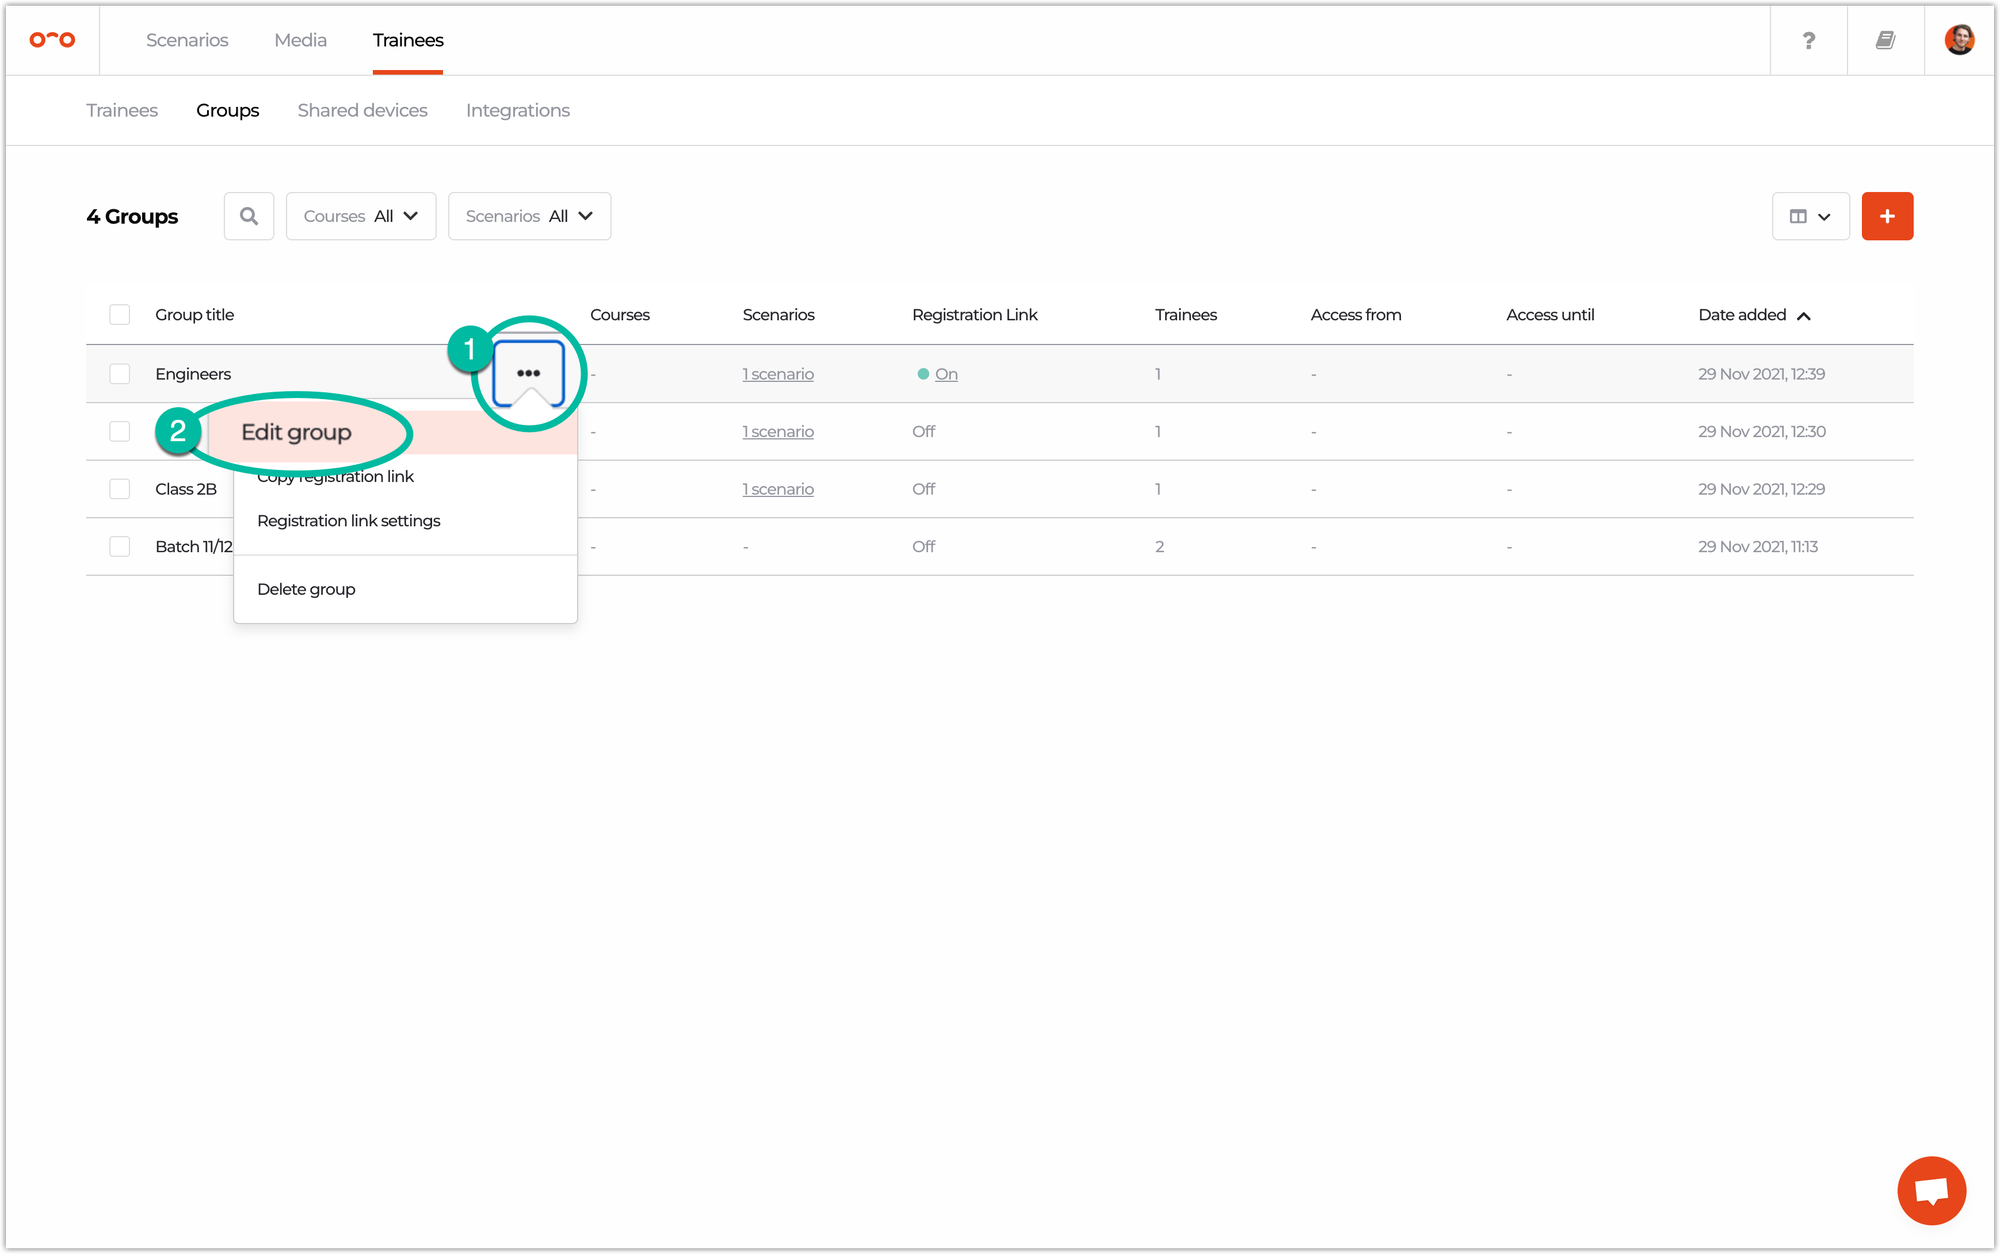
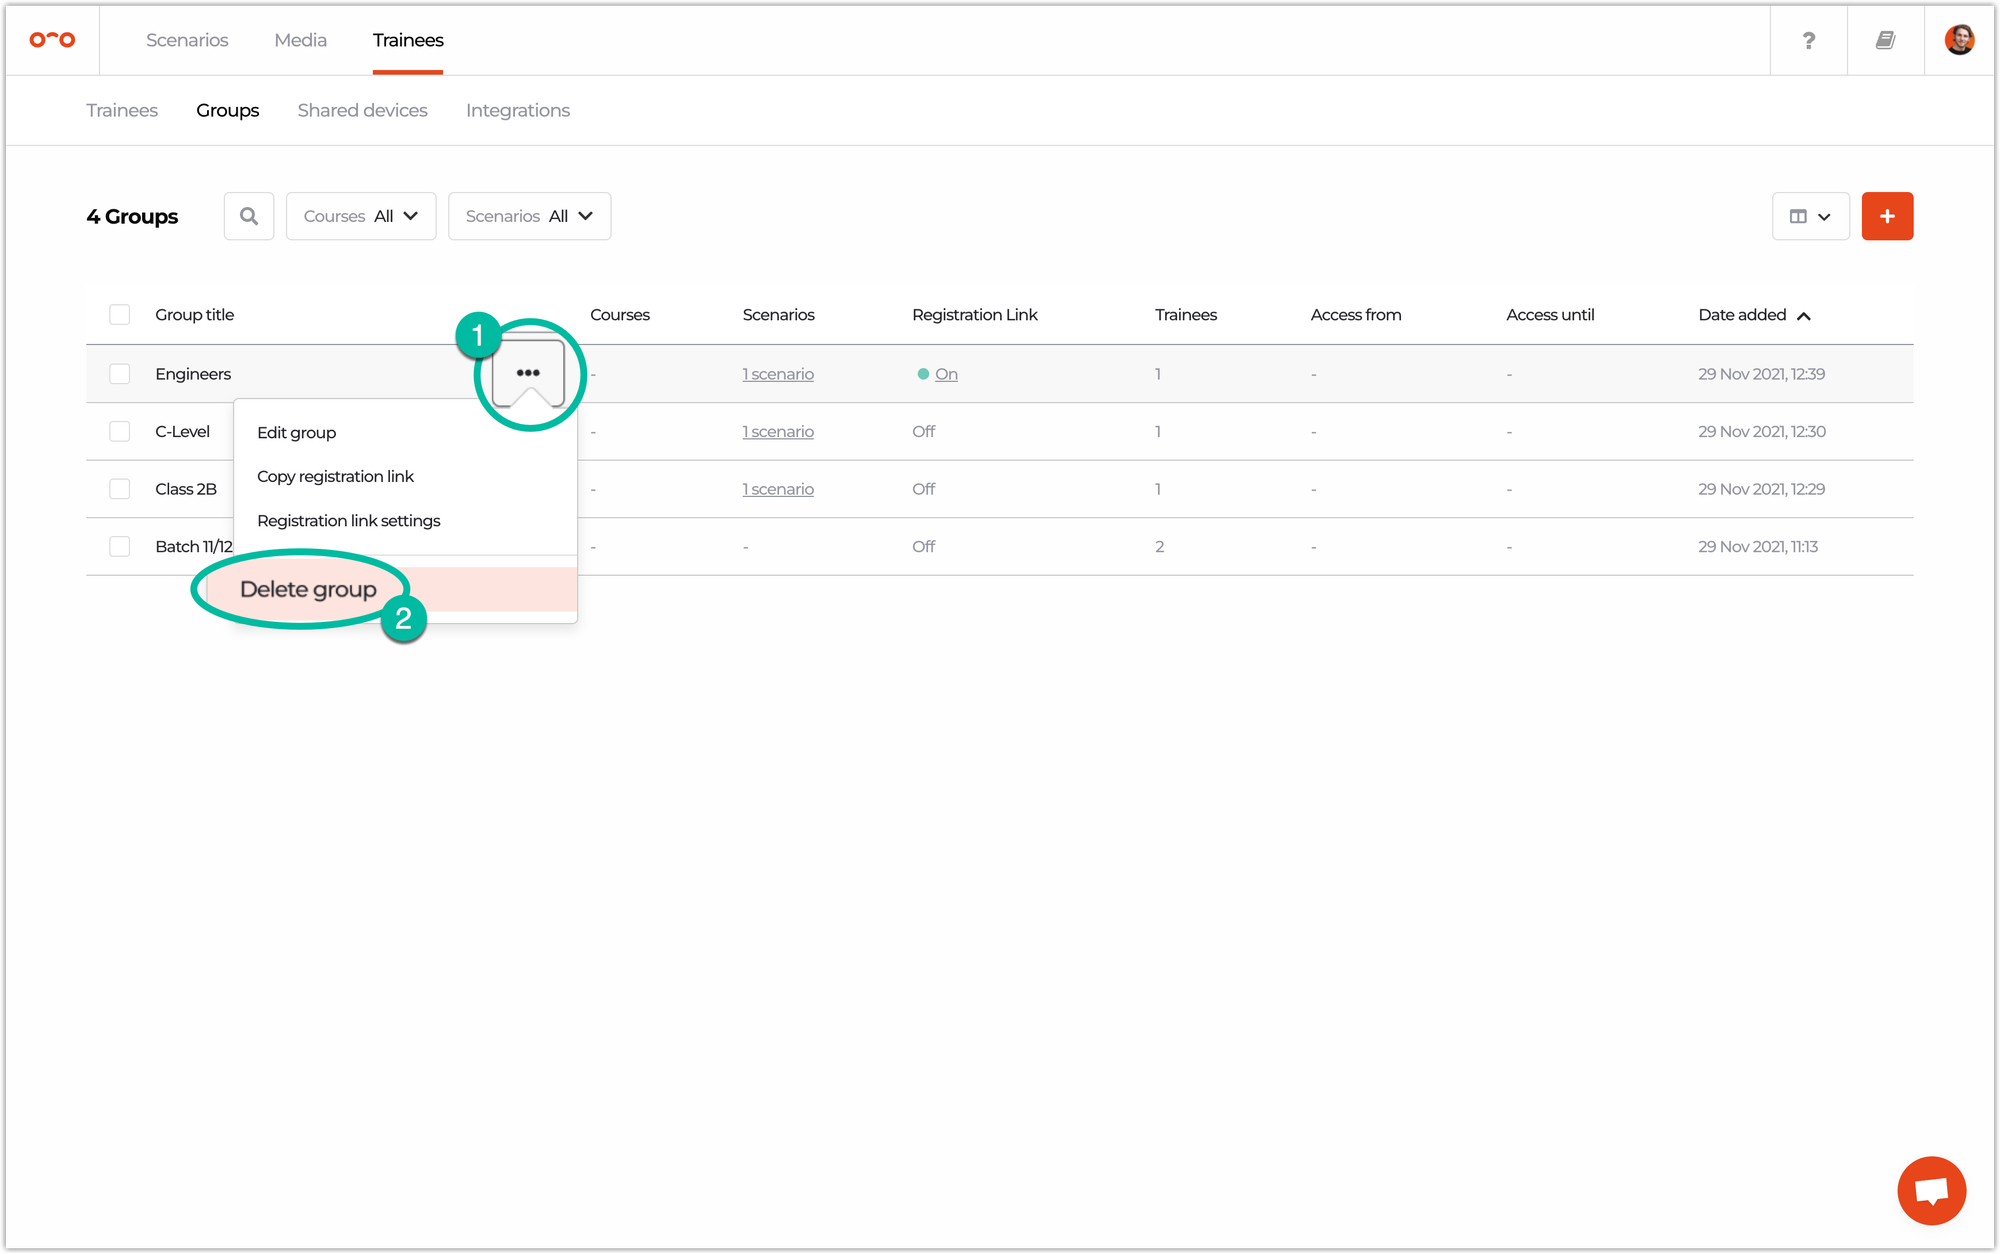
❌ Edit or delete a group
Groups can be edited or deleted. Hover over the 3 dots button 🚥 and select what you prefer. Access to scenarios, as well as the group name can be changed.
If you delete a group, no worries, trainees won’t be deleted as well.
Interested in more:
➡️ Learn how to add a trainee before adding them to a group. ➡️ Add many trainees by importing them.