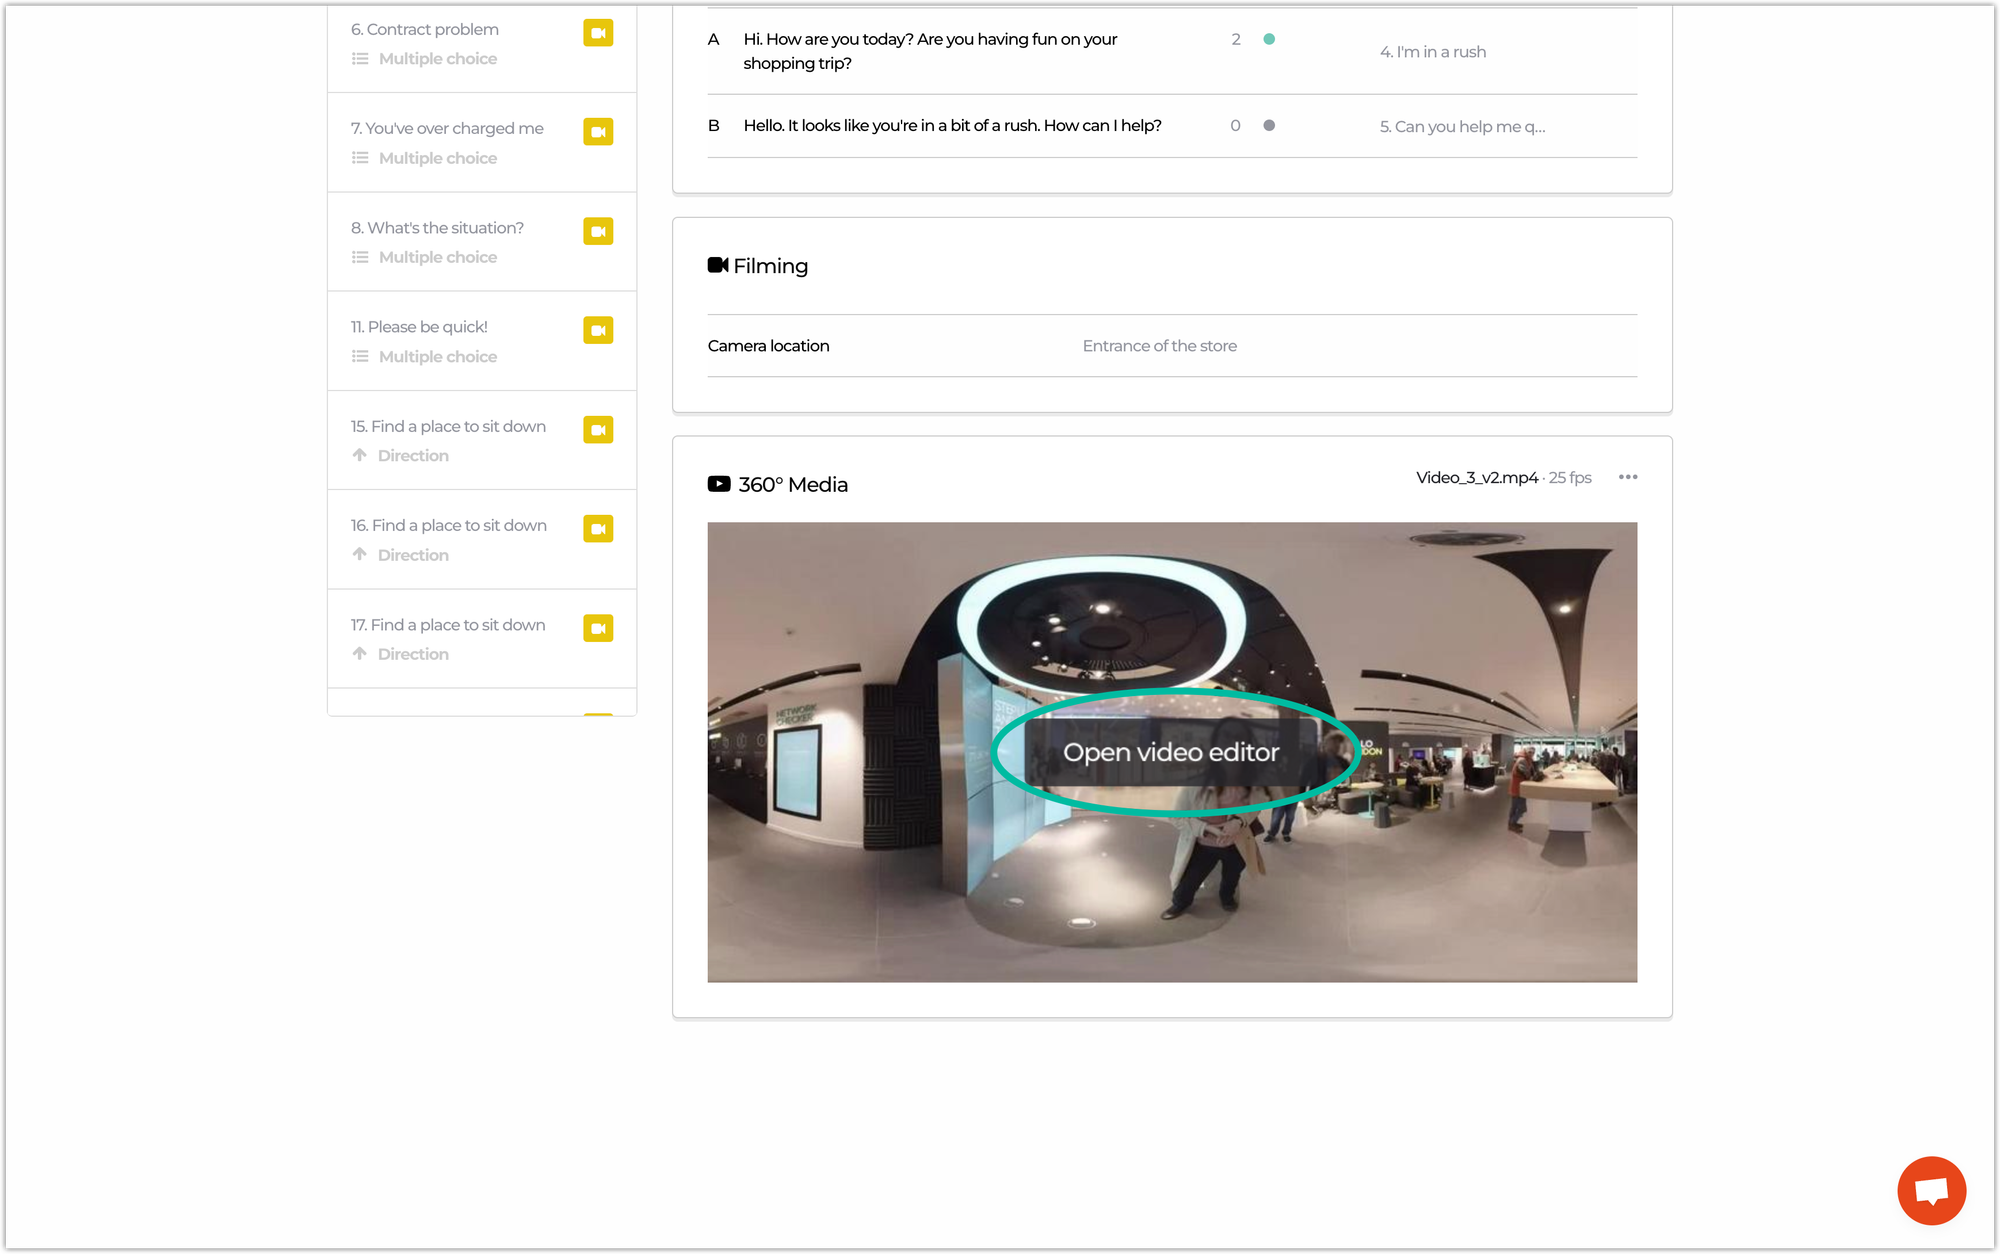
To open the video editor:
- Navigate to the Scenarios tab and click the scenario you want to open.
- Go to the Scenes tab and click the scene you want to open.
- Scroll to the bottom and click on Open Video Editor in the 360° media card.

🍭 Video editor layout
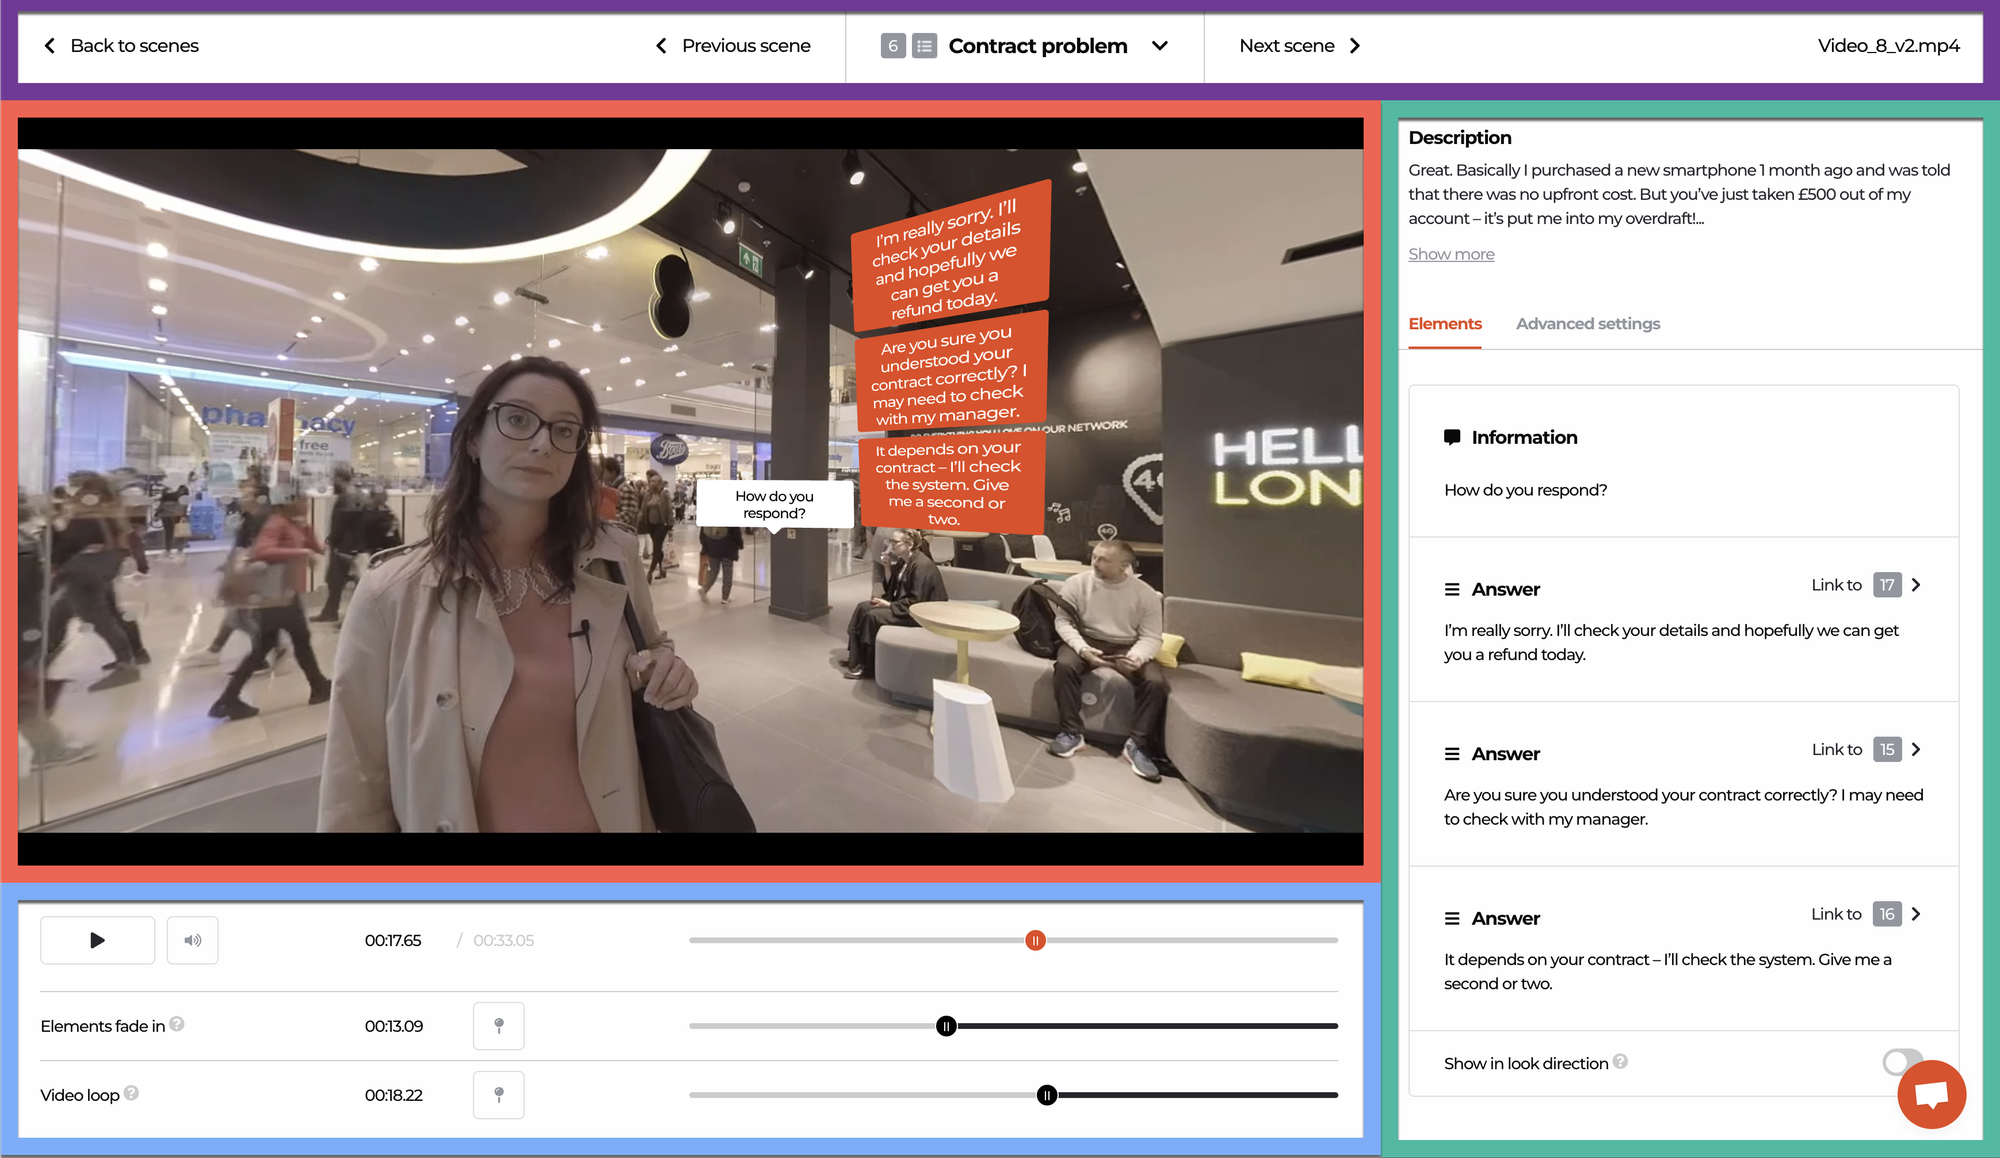
The video editor is divided into several sections:

- Header: navigation between scenes
- Sidebar: show and edit elements in videos
- Video section: position elements in scenes
- Controls section: adjust video playback, set element timings and video loops
🪁 Elements and controls
➡️ Move the video around
Click anywhere in the video and and drag in any direction to look around. This is just for you as a Warp Studio user and doesn’t change the way trainees see your video.
➡️ Position elements
The information, questions, answers, direction or hotspots are elements you can place anywhere in the videos. First, locate the elements in one of two ways:
- In the video section, look around and find it yourself.
- In the sidebar, hover over the element you want to locate and click the Show element in video button.
To position the element somewhere in the video, hover over the element in the video and a yellow box shows up behind the element. 🟨 Click and drag it to move the element around.
➡️ Elements fade-in
In the controls section, this setting sets the time when the elements will become visible for the trainee in the video. Click and drag the playhead to the moment you want the elements to become visible in this scene. You can also use the pin button 📍 left of the slider to set the elements fade in to the current video time.
➡️ Video loop
The video loop setting will set the time from which the video will start looping after its end. When a scene is entered, the video starts to play from the beginning until the end. If the end is reached, the video will jump back to the video loop time and continue to play until the end again. This will repeat until the player makes a choice to continue to another scene or stop playing. 🔁
To set a video loop, in the controls section click and drag the playhead to the time you want to start the video loop. You can also use the pin button 📍 left of the slider to set the video loop to the current video time.
➡️ Initial orientation
The initial orientation is the look direction in which a trainee will enter the scene, which will be visible with a red line, if set up.
To set the initial orientation, click on Advanced settings in the sidebar. Enable the button, click and drag the playhead. You will see the red line moving in the video section. Position this line where you want the trainee to look first.
➡️ Edit elements
To edit the text of your elements, hover over the element in the sidebar and click on Edit next to the pencil. Make changes and click Confirm. You will see you changes right away in the video section.
➡️ Show element in look direction
This is a setting that will overrule the location where you place the element in the video. It will ensure that when a trainee enters a scene, they see this element in front of them, regardless if they enter the scene with their heads turned or looking into a different direction. 🧐 The element will always move in the center line of view.
To enable this, enable the button next to Show in look direction under an element in the sidebar.
➡️ Other details
The video editor saves after every change, so whatever you’ve done, it is already saved. ✅
You can’t change colours of the elements in the video editor. However, after publishing a scenario, your company colours will be used. 🌈
😱 Troubleshooting
My screen is always black.
This should not happen. Please contact us for a solution.
I just added a video, but still see the ‘no video’ screen.
A refresh of the page (Ctrl + Shift + R) might reload the video.
My video won't play.
This can happen due to different reasons. Things you can try:
- Check your internet speed.
- Refresh the page.
- Try a different browser.
Interested in more?
➡️ Check other media settings. ➡️ Learn how to trim videos within Warp Studio and never need trimming tools again!
