In your workspace settings, you can easily edit the branding settings of your company, such as: company name and description, logo, as well as brand colours.
⚠️ Branding is visible to all invited trainees while playing scenarios on any device.
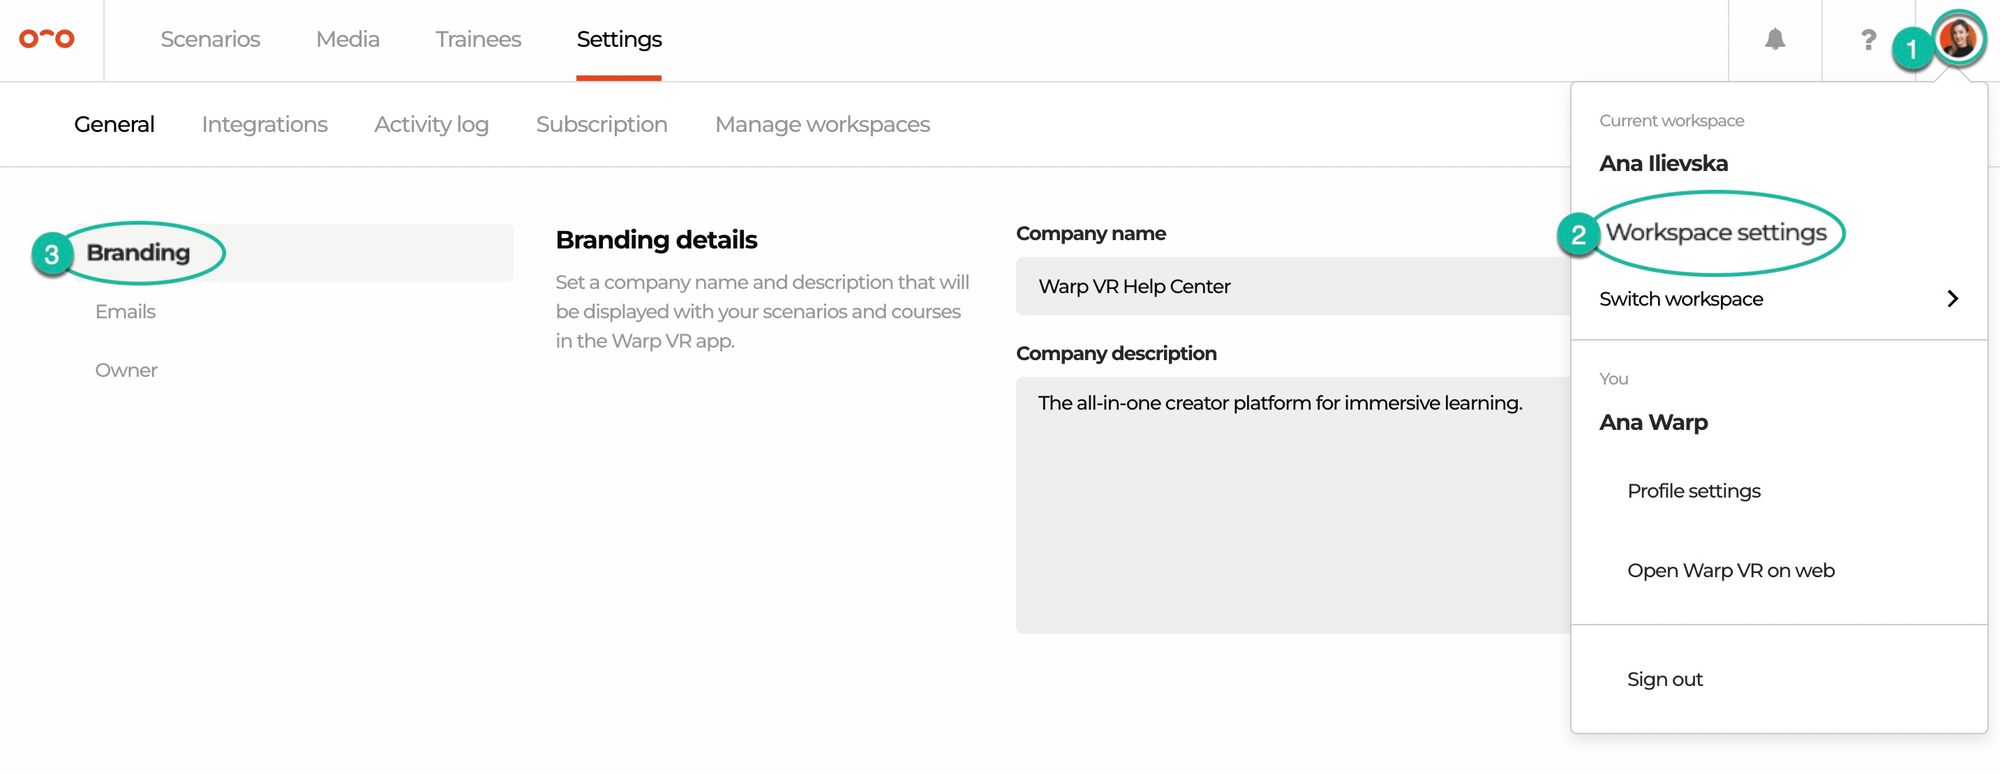
To access the branding settings:
- Log in Warp Studio and click on your icon in the top right corner.
- Select Workspace settings from the dropdown.
- The General settings tab will be opened, containing the Branding settings.
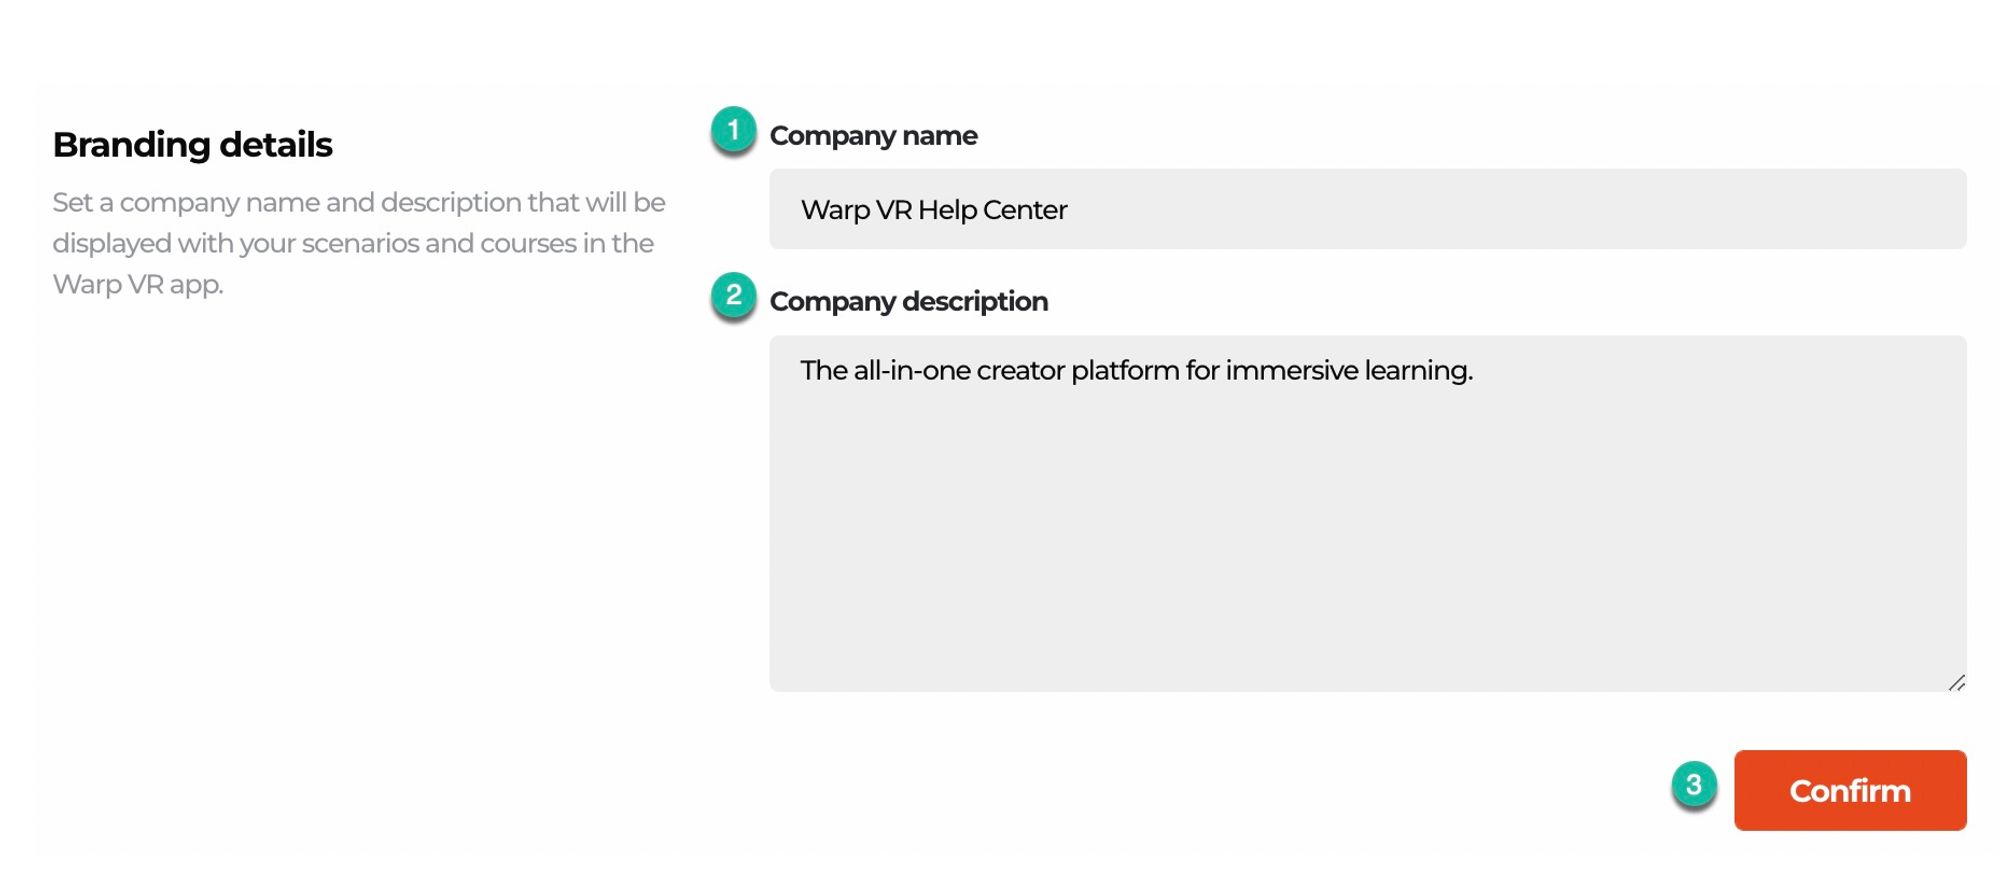
ℹ️ Branding details
Add the following info:
- Company name that will be shown in the mobile app and all other communication (not to be confused with an account name).
- Company description of your account's training center, shown in the settings of the mobile app.
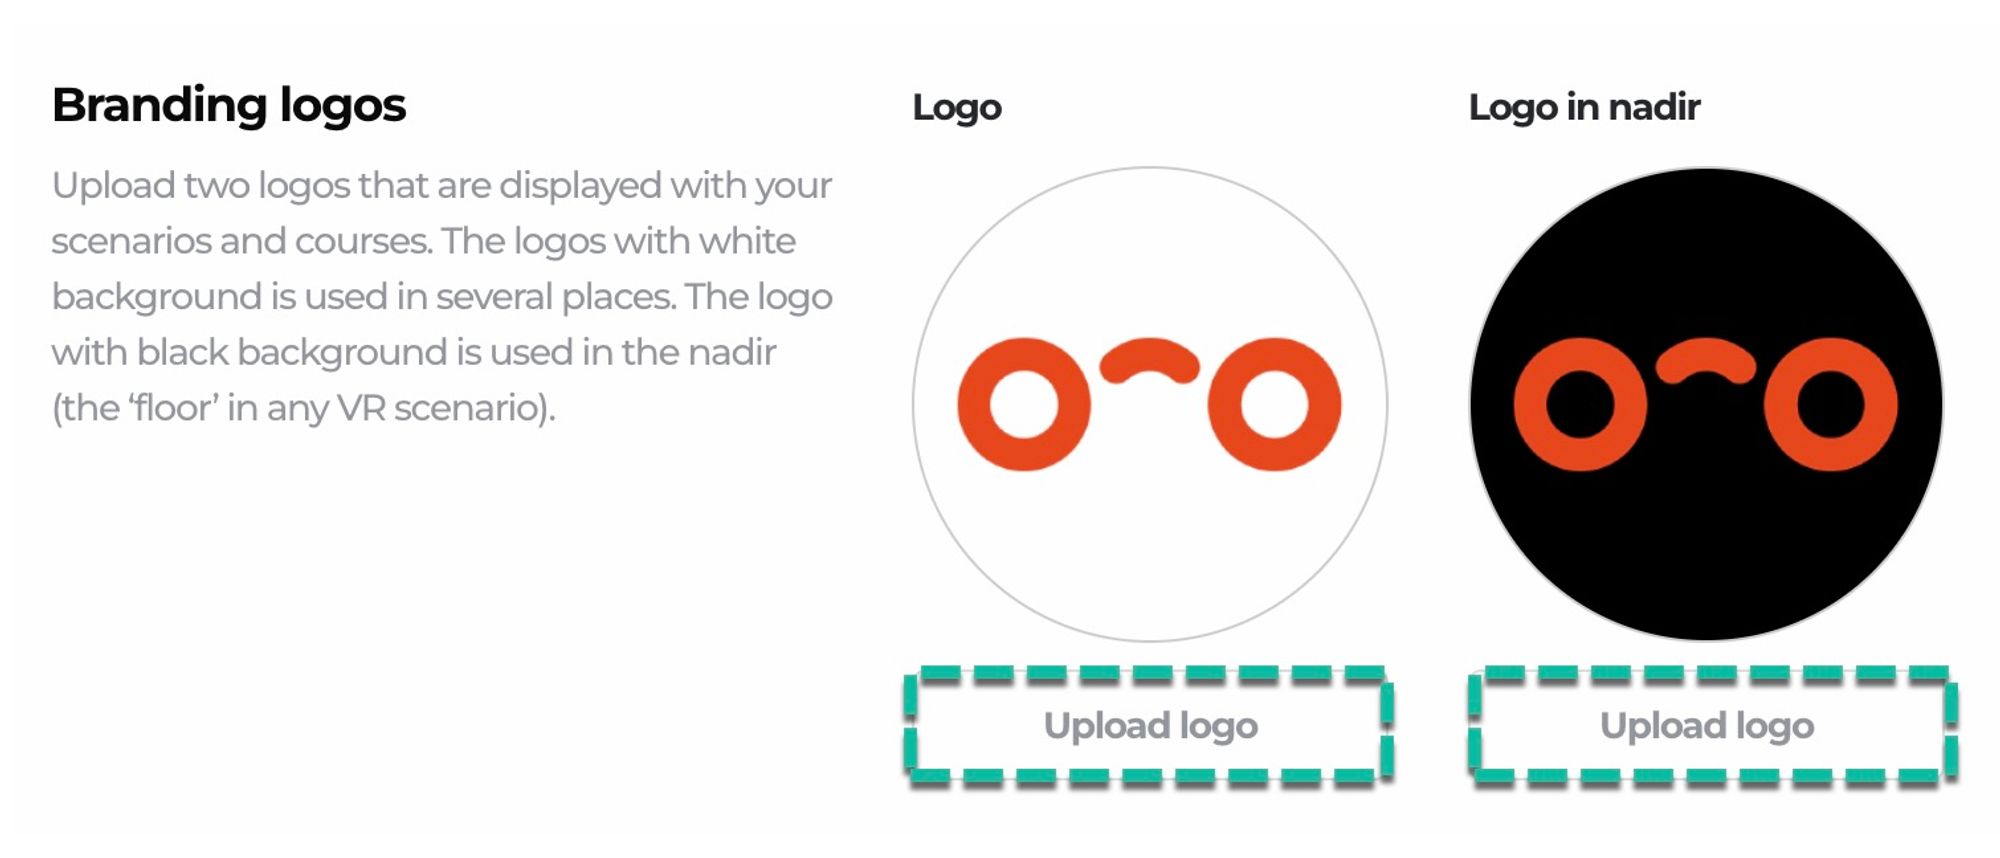
💠 Branding logos
You can upload 2 types of logos:
- A logo used in the Android/iOS mobile app 📱, shown on top of scenarios within the scenario overview page.
- A logo used in VR headset, visible as a circle beneath the standing point 👣 in a VR scenario.
Scroll down from the general branding details, to edit your branding logos:
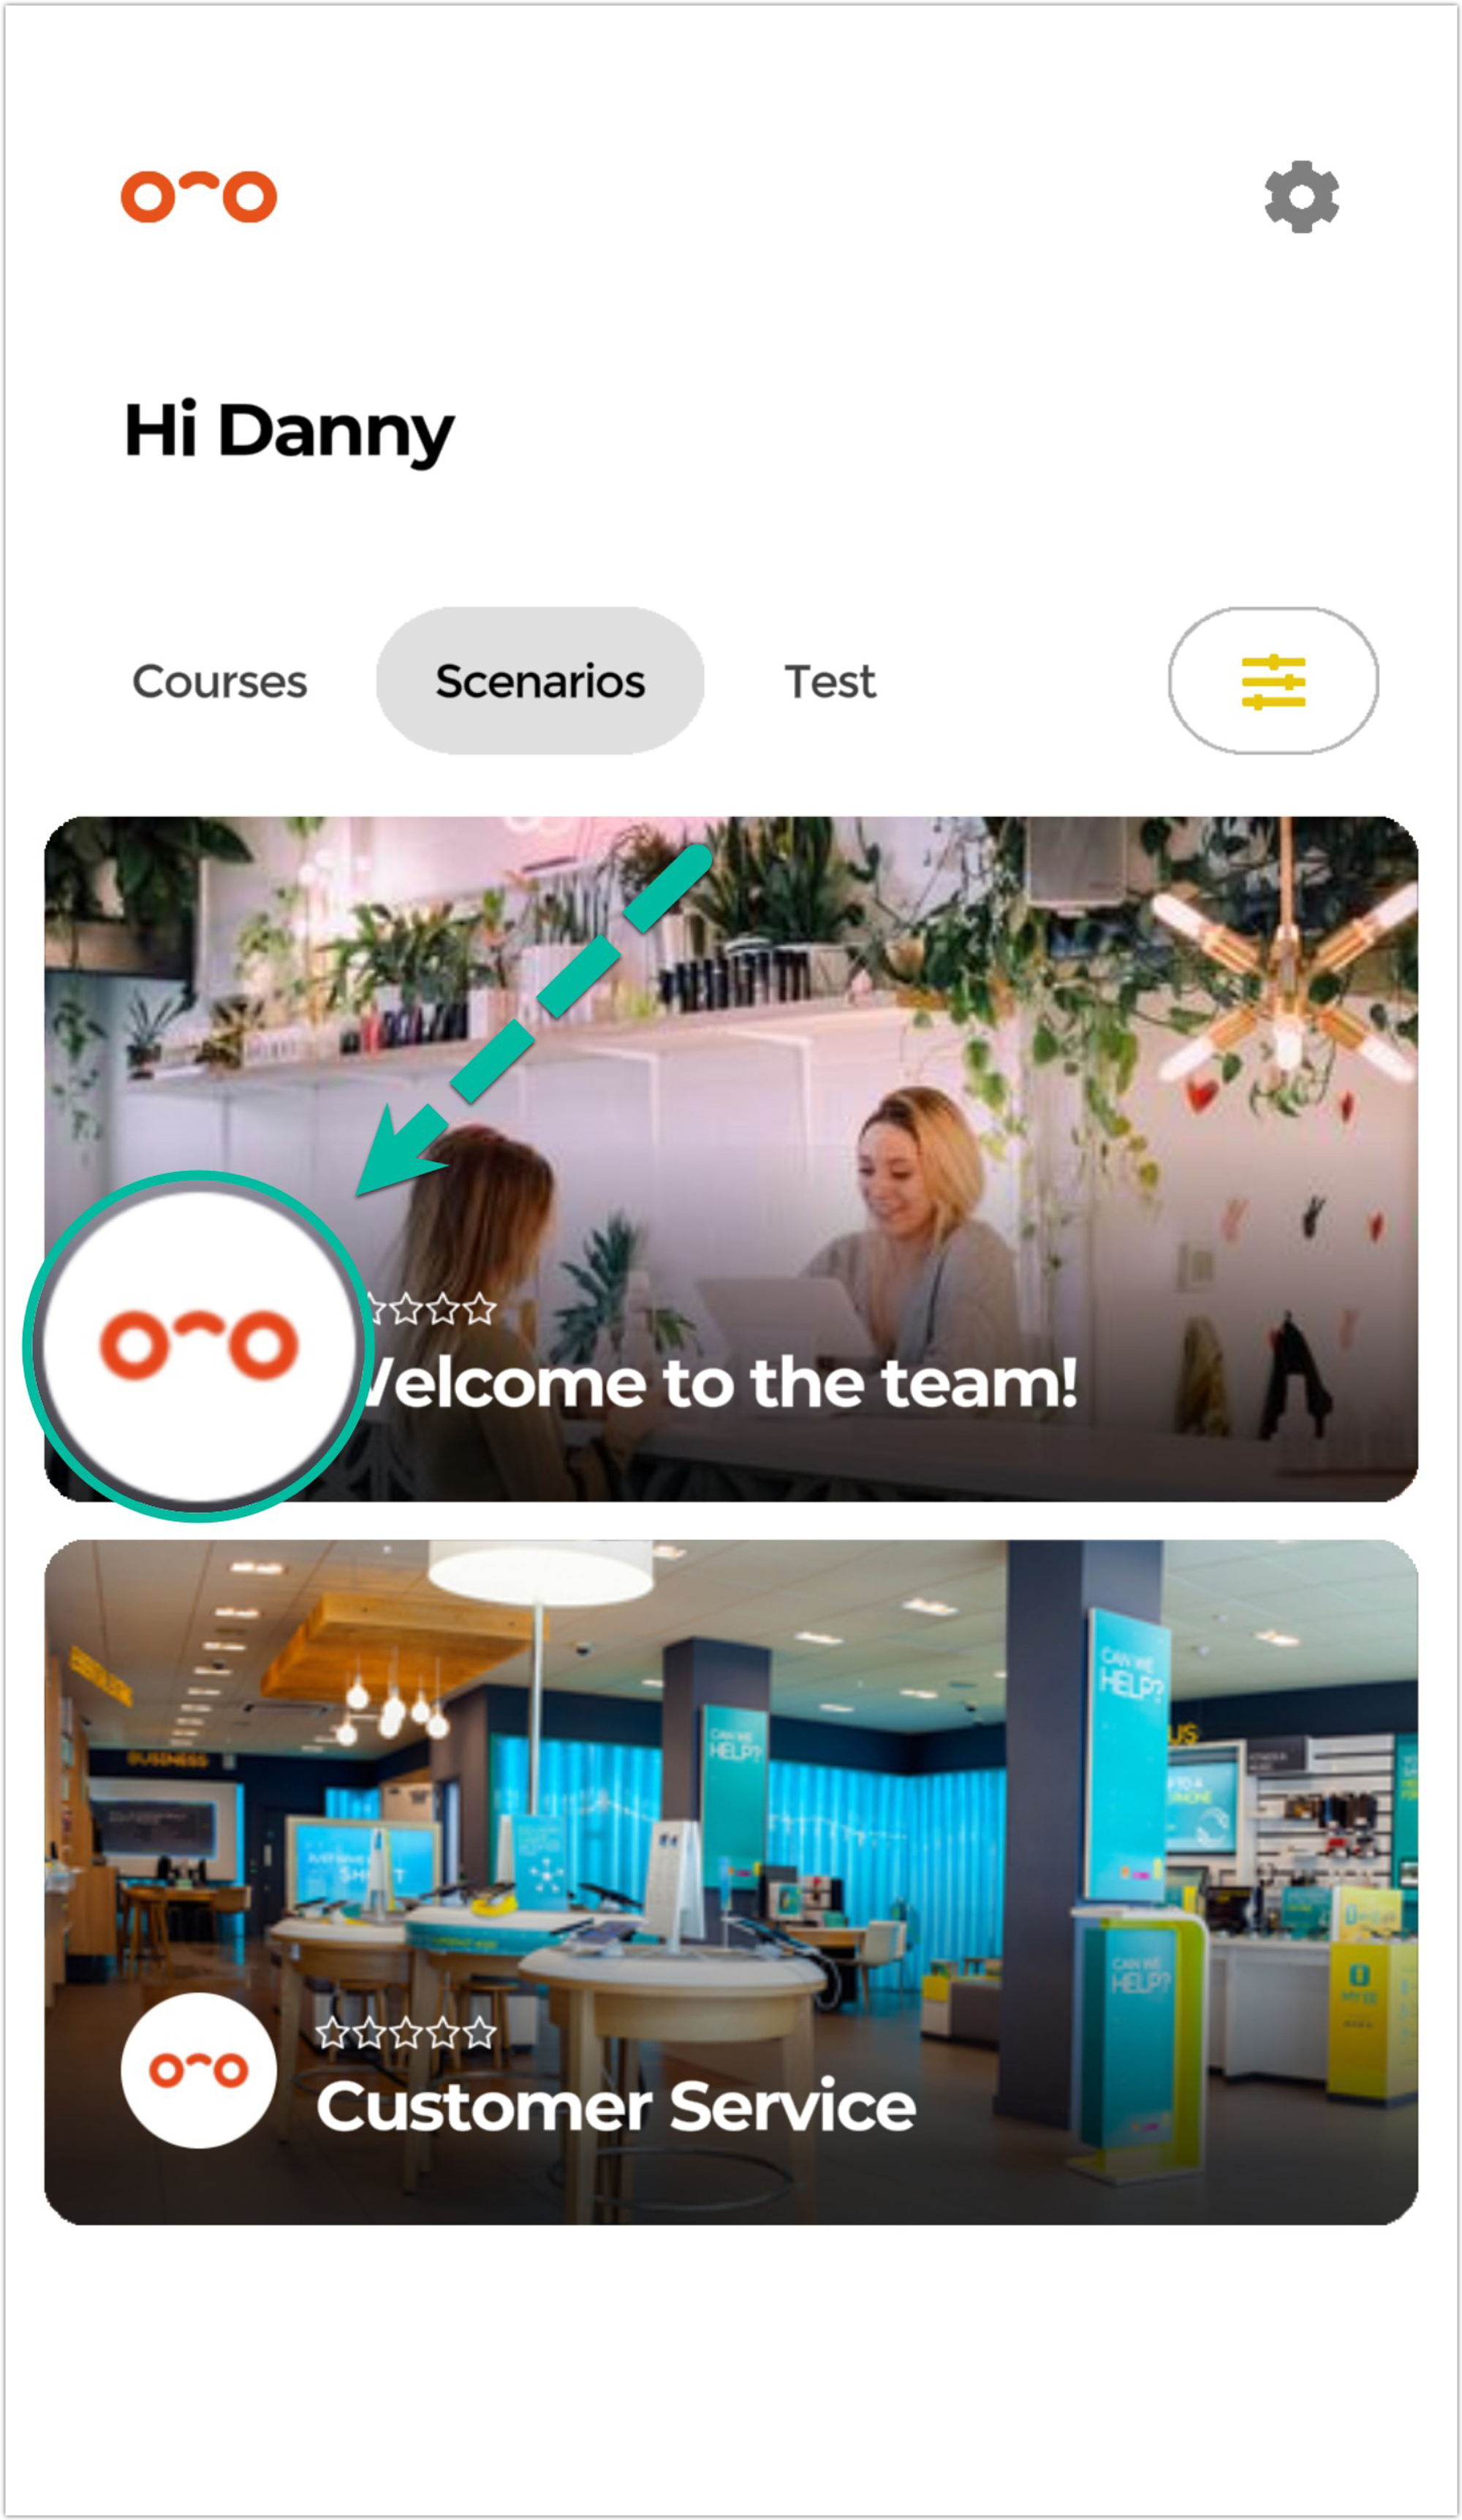
Once updated, this is how your logo would look like in the Warp VR app scenarios:
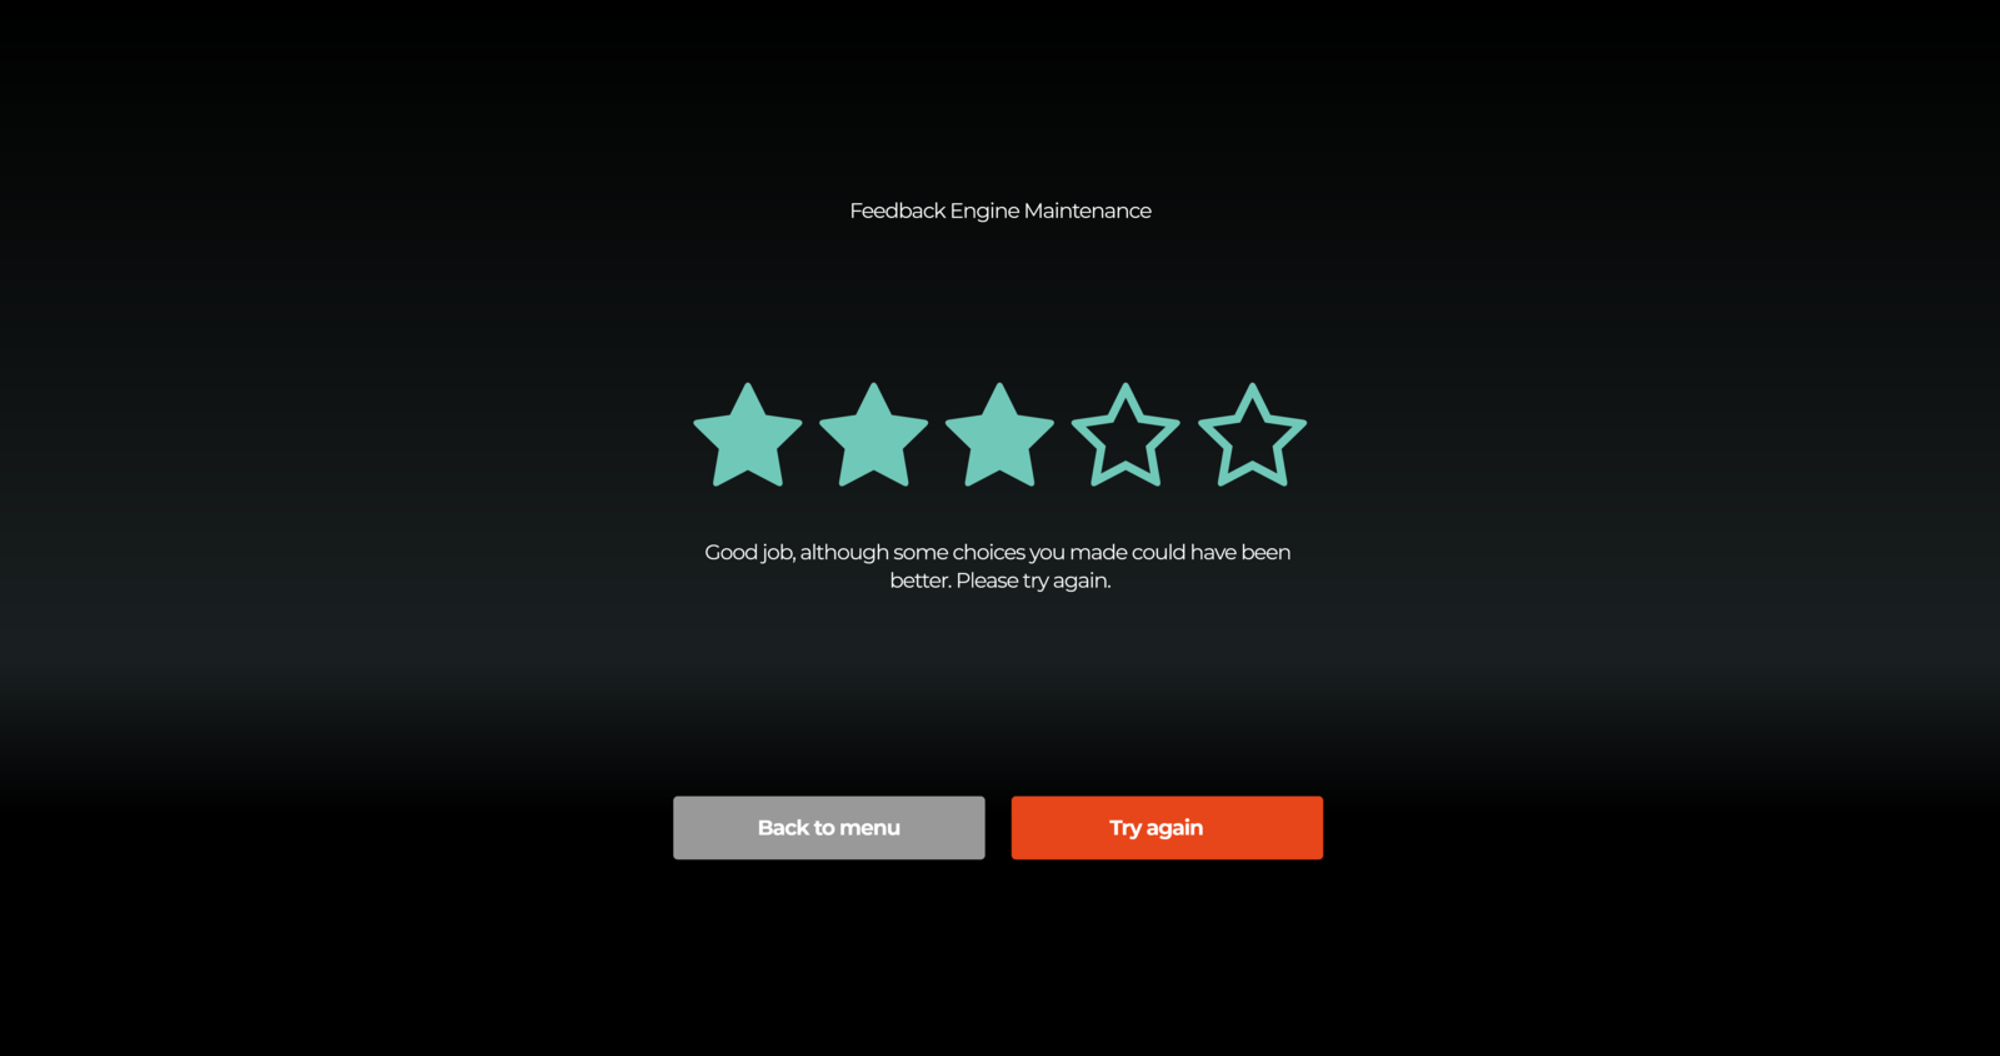
🎨 Branding colors
Beneath the branding logos, you can also customize two types of colors to fit your company's branding guidelines:
- Primary color: applied to certain buttons in your training center menu, as well as the buttons in VR scenarios.
- Secondary color: applied to certain warning messages and the results stars at the end of a scenario.
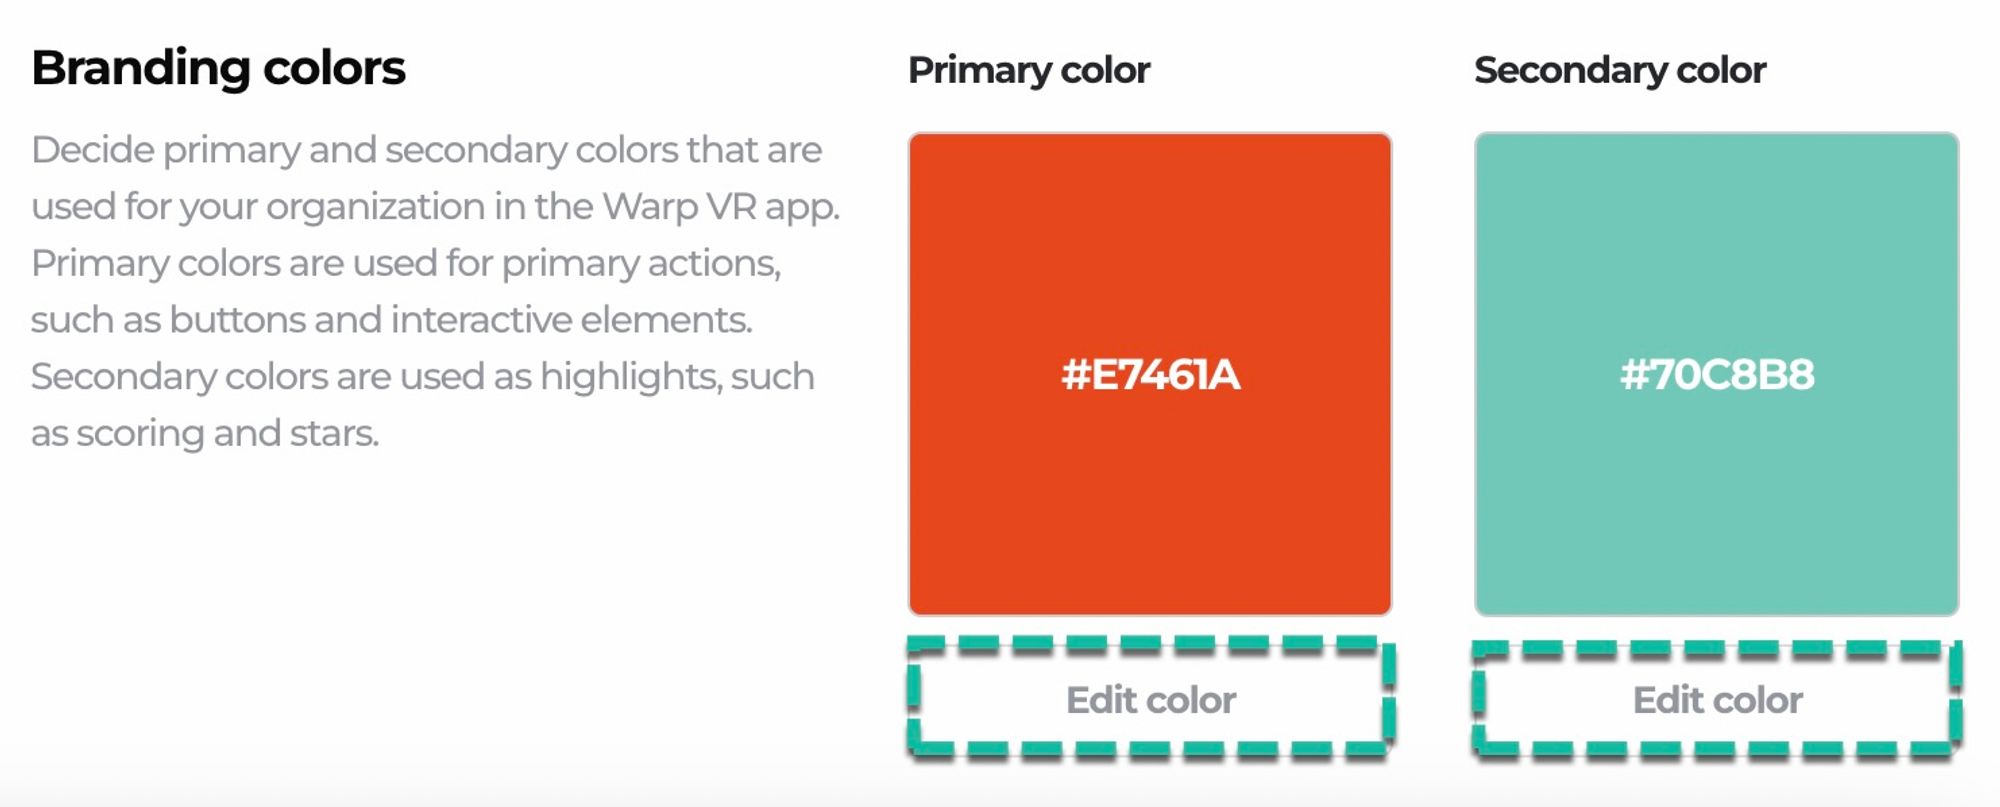
Here are some examples of how a primary and secondary colour would be used and look like:

Interested in more?
➡️ Learn how you can set up the email settings. ➡️ Learn what different users can do in Warp Studio.