With workspaces in Warp Studio it becomes easy to separate scenarios, trainees and data. Ready further on why multiple workspaces are beneficial and how to add & manage more. 😎
🤝 Why multiple workspaces?
For example, within one company/organisation/university there may be different sides that would like to use immersive learning, such as:
- Departments
- Locations
- Factories
- Curriculums
- Clients, etc.
To avoid all of them using the same account within Warp Studio and view each other’s scenarios, users data and analytics, you can create and manage multiple workspace slots to efficiently separate, keep them secure and private. 🔐
Other benefits:
➡️ Each workspace comes with its own branding settings, so you can use the names and styling of departments or factories for these specific workspaces.
➡️ Set up different LMS or LXP integrations in each workspace (or just use the same).
➡️ Integrate specific workspaces with enterprise features such as SSO or SCIM.
➡️ For account owners, workspaces now include: your subscription plan, published scenario and workspace slots, branding, emails, integrations, activity logs, etc.
➡️ Whenever you come back to Warp Studio, you will always enter the workspace you last visited.
🔢 Add and manage workspaces
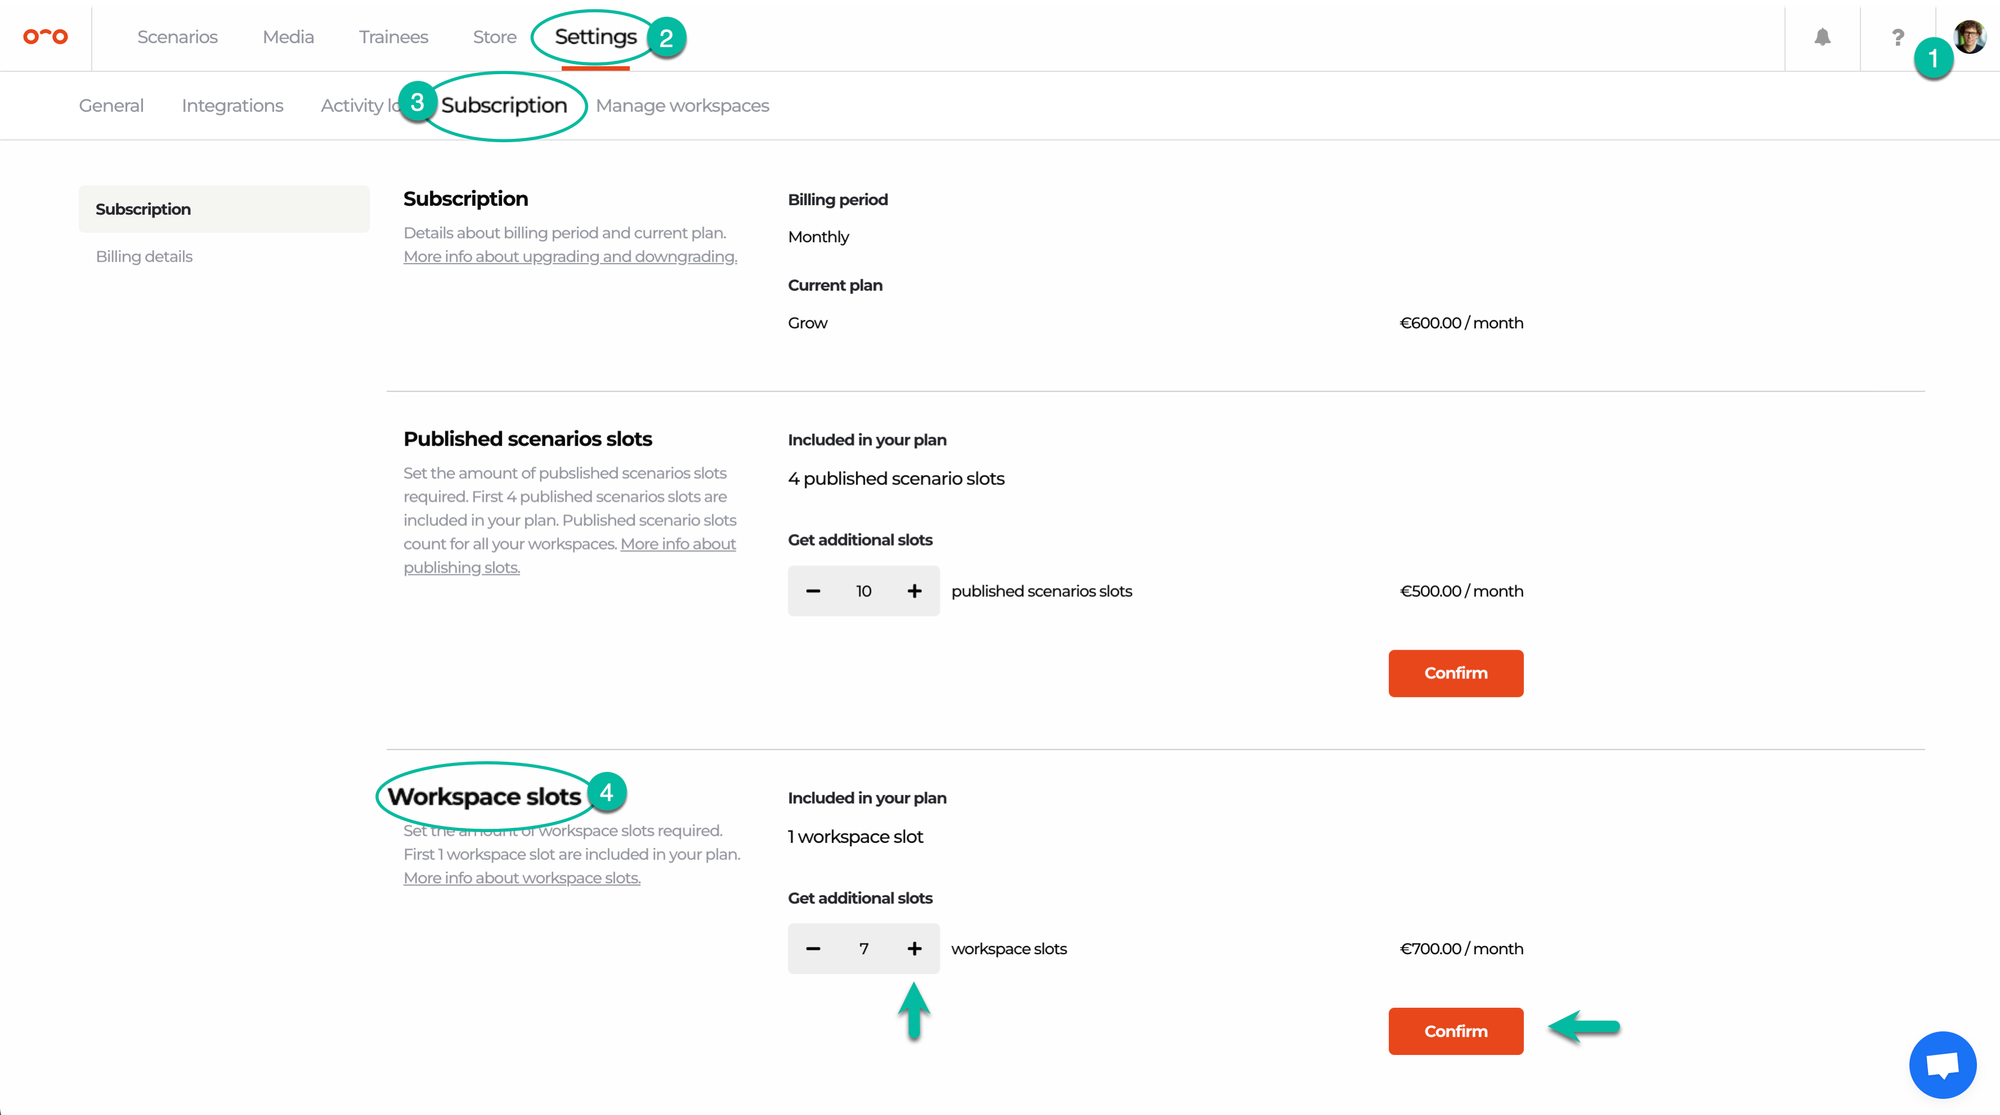
You can always add and manage more workspaces, by accessing the Workspace settings page in the top right corner dropdown.
Add more workspaces:
- Navigate to Workspace settings, click the Settings and Subscription tabs.
- Scroll down to Workspace slots and add as many slots as needed.
- Click confirm.
⚠️ Each Warp VR subscription plan comes with 1 workspace already included. Purchase of additional workspace slots is available only for the Grow and Scale subscription plans, for the price of €90/$108 per additional workspace per month. Any added workspace slot will be charged in next month’s/year’s invoice.
Create and manage newly added workspaces:
- Navigate to Workspace settings and click the Manage workspaces tab.
- Click + in the top right corner.
- Add a workspace name and make yourself or someone else an owner. An owner can always be changed later by the owner of that specific workspace.
⚠️ There is no support yet for deleting workspaces. Contact us at support@warpvr.com or on live chat when you would like to delete a workspace.
Interested in more?
➡️ Learn how to easily switch between workspaces. ➡️ Discover different workspace settings and how to use them.