Hit the Publish button in the top right corner! 🚨

The publishing process consists of three steps:
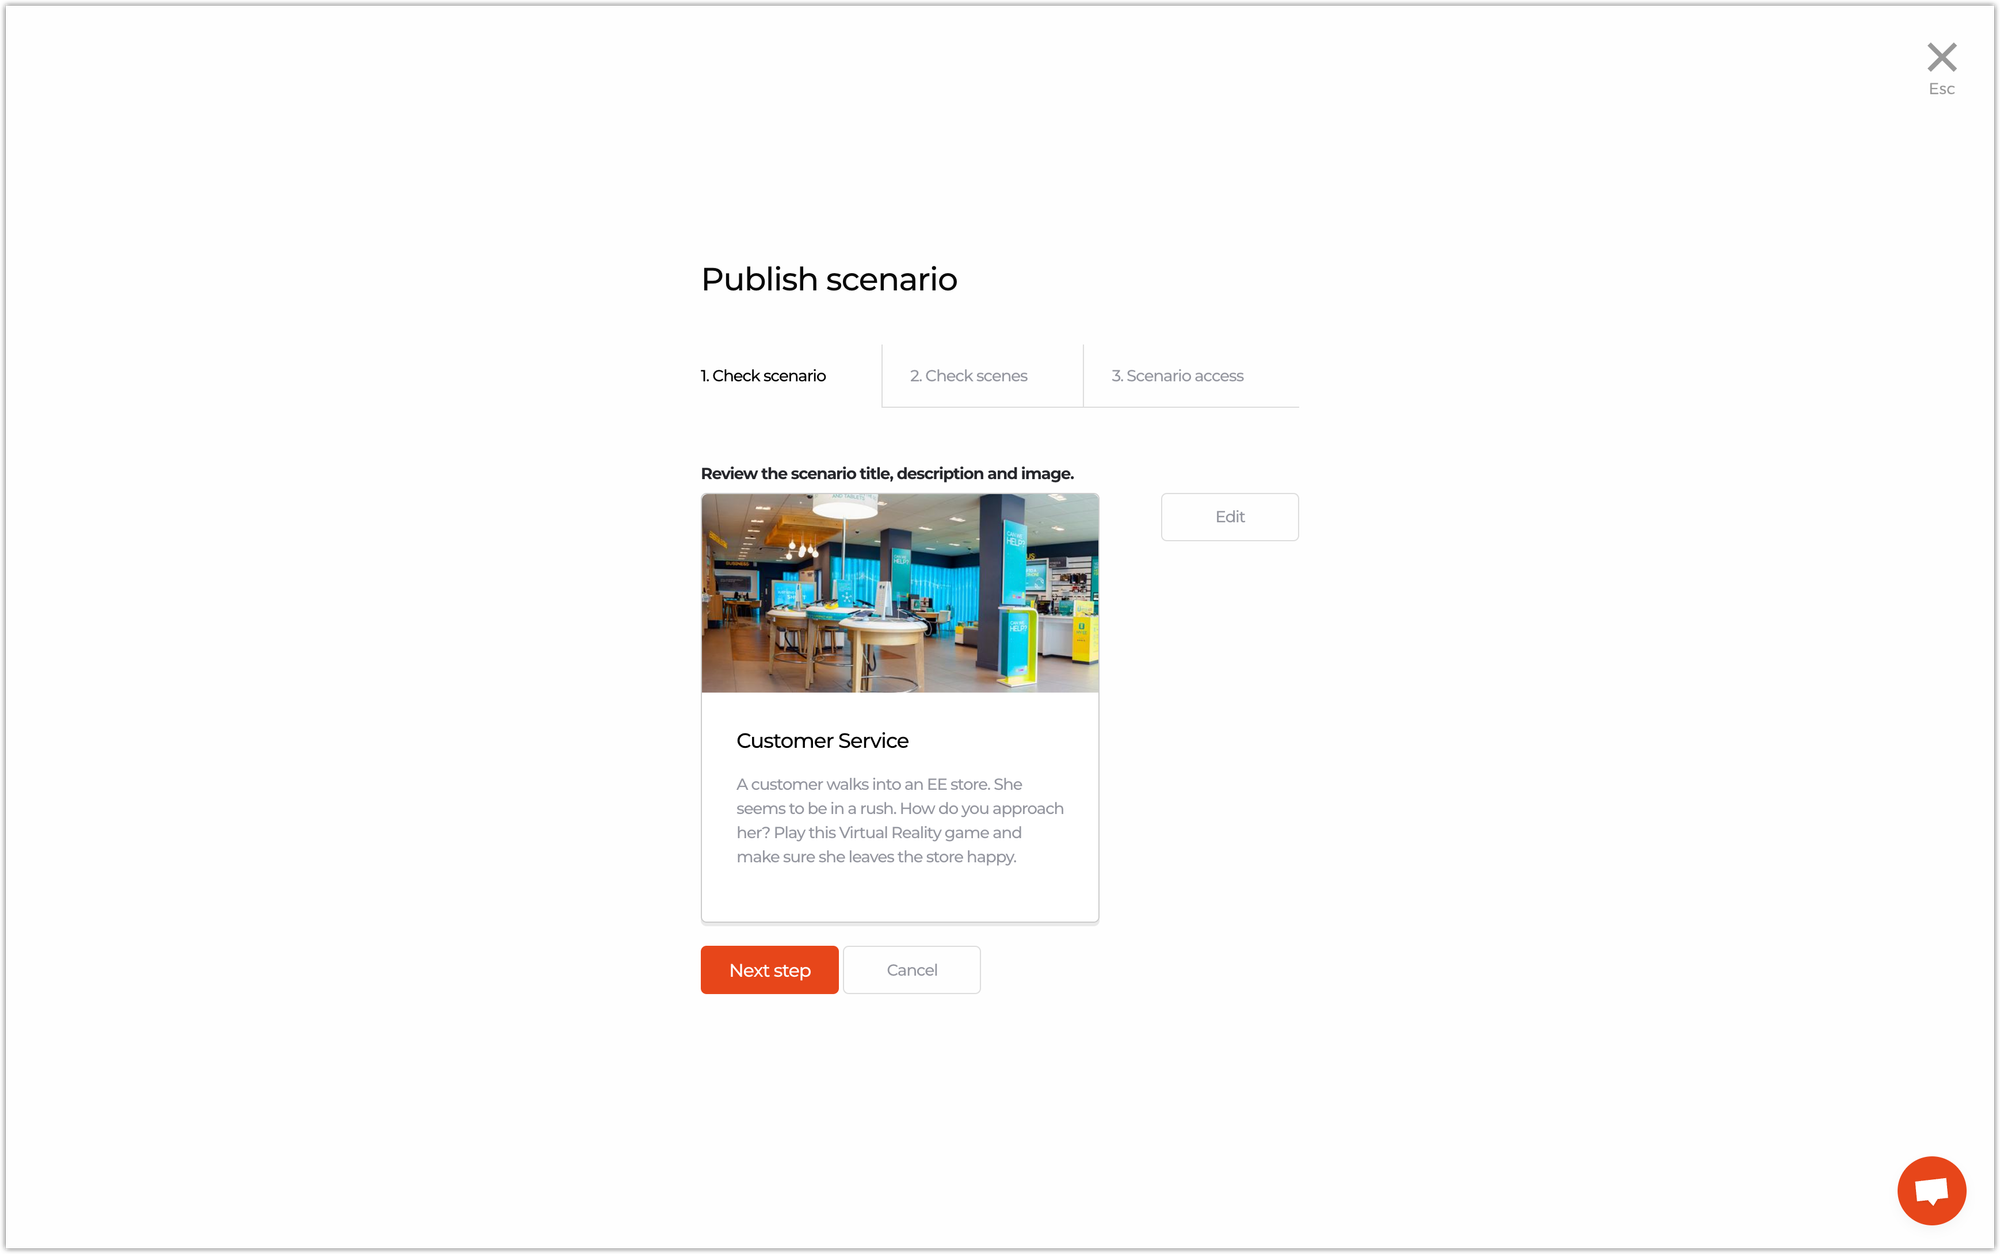
1️⃣ Check scenario
Double check the scenario:
- Title.
- Description.
- Image.
If needed, make changes with the Edit button.
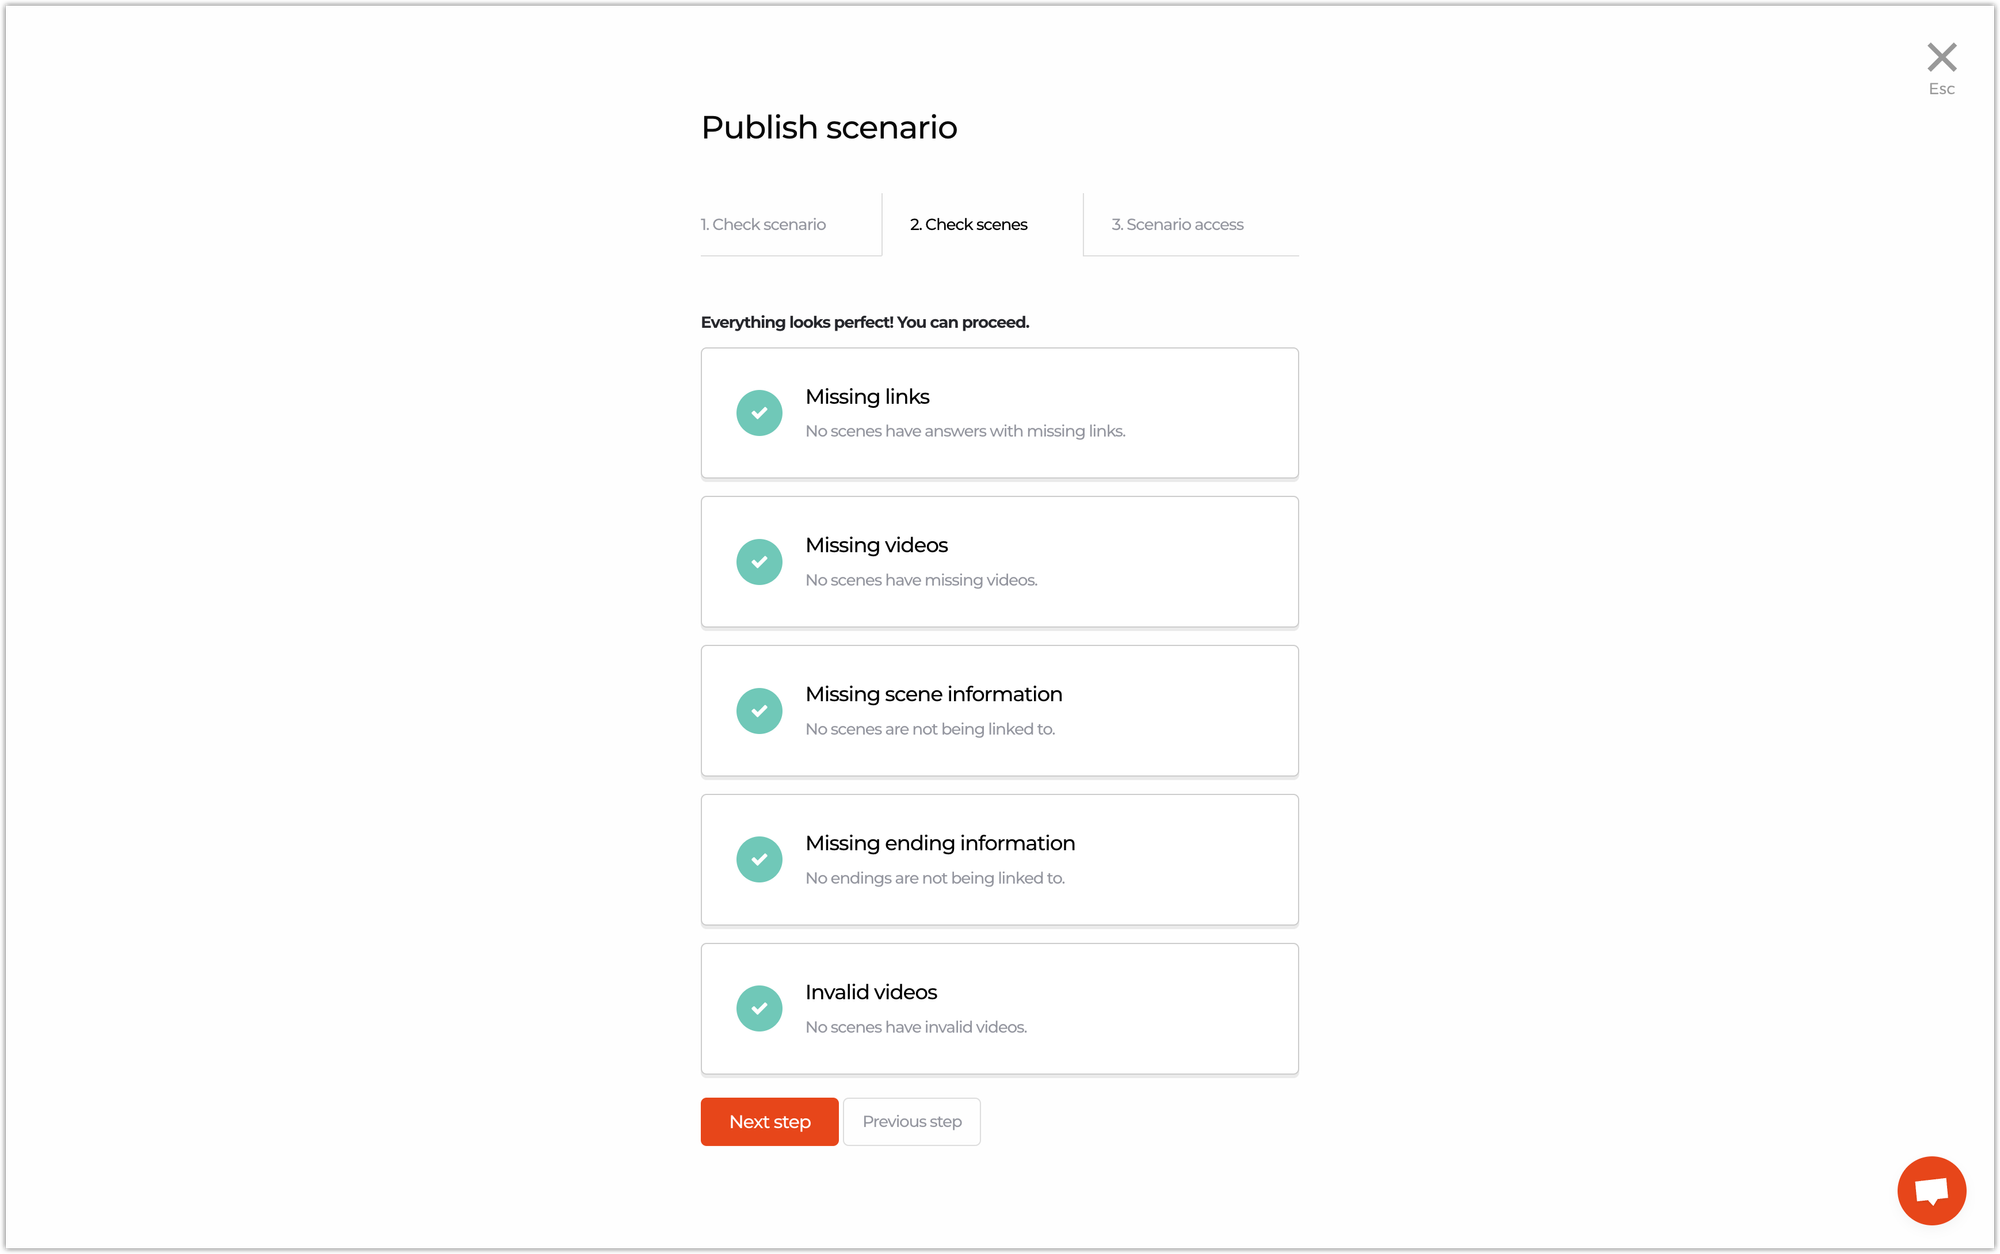
2️⃣ Check scenes
Then you can check all scenes for any issue listed below. If some things aren't in order, you can still publish, but your scenario might not work properly. 😬
- Missing links: Is a scene missing links? If yes, your VR scenario might not work correctly. Fix and publish again.
- Missing videos: Is a scene missing a 360˚ video? If yes, please fix. Otherwise trainees won’t see anything. ⬛️
- Missing scene information: Is there a scene which is not connected with another scene? This means that trainees can never see this scene.
- Missing ending information: Is there an ending in your flow diagram which doesn't have a connection to another scene?
- Missing overlay information: Are there scenes with image overlays with missing answers? This is not supported yet in the Warp VR app. ❌
- Invalid videos: All videos for a scenario need to be recorded with the same amount of frames per second (fps). If the fps for all videos are not equal, you might have problems viewing your scenario.
3️⃣ Select group
Finally, choose the trainees that will get access to your scenario.

🆗 Scenario status
After hitting the Publish button, the status of your scenario changes, from being labeled as Draft to green Published. ✅
You can always do changes on published scenarios, but the changes made will be in draft mode.
⚠️ Therefore, make sure to always hit the Publish button after any changes made in your scenario, to make them available for all your trainees.
Interested in more?
➡️ Learn how to create a group of trainees for a published scenario. ➡️ Learn how to play a scenario once published.